Monday 31 October 2011

Now the children have all gone to bed...

...well you didn't really think I'd miss the chance for a really scary one on Hallowe'en did you? Especially when there are two challenges asking for houses!! How could I resist a haunted house? Well, I couldn't Mwwwaaaahhhhaaaaahhhhaaaaaa *Maniacal laughter*

There are way too many pics, so why not pour yourself a glass while you're waiting for it to load... and if you are easily offended, please look away now and come back another day ;-)

"Haunted house"

[House cut from Tim Holtz' grungy cardstock. Well whose else could it be?]

"Blood"

[The "blood" is really a deep red gritty embossing powder with lots of splatters!]

"Shingle roof"

[Small pieces of cardstock stuck on as individual shingles.]

"Ghosts"

[Characters from the "Lost and Found" paper pack are peeping out from the windows.]

"First corner view"

We're moving around the corner a little here... what's that in the doorway??

"Foot"

Aaarrgghhh - a Graphics Fairy severed foot!!

"End of house"

Eeeewww, a severed hand on the doorknob and another reaching into the window!

"Severed hand"


Oh no, that one seems to be grasping a smaller hand on the inside of the house!

"Through the keyhole"

We look through the doorway, but it's too dark to make out the inside properly [the inside of the walls are decorated with more Tim Holtz people and perspectives from the Graphics Fairy, but they won't come out with the camera - boo hoo!]. Let's move on...

"Second corner view"

Oh no, it's getting worse...

"Side view"

...is that a gggggrrrraveyard??? *shakes with fear*

"Pet Semetary - R.I.P Spot""

No worse, it's a "Pet Sematary" aaaarrrrgggghhhhhh

[aside: I love horror novels. "Pet Sematary" by Stephen King is the only horror story I've ever read that scared me! - and yes, it's supposed to be spelt like that :)]

"Spiders"

Noooo, spiders... [drawn]

"Ants"

...and ants!  [stamped]

"Hands on the roof"

Those hands are trying to get into the house by prising the shingles loose - looks like it's working.

"Eye eye"

Yuck, there's a disembodied eye peeping out from behind that window, and blood running down the frame from the hands on the roof.


"Hand behind gravestone"

Another hand appears to be clawing it's way out of the grave.

[The "mud" around and on the gravestones is actually lots of brown embossing powder. Overheating it leads to a grey colour which looks great on the front of the gravestones]

"Third corner view"

For the first time, we get a glimpse of the word written in blood on the last wall.


"Help..."

Well, I guess that's all the guy managed to write before he was stuffed upside down into the chimney...

"Feet in the chimney"

...at least, I think it's a guy. Not so easy to tell just looking at the feet.

Entered for the following challenges:

Merry Hallowe'en from the lucky black cat

After all those intricate Hallowe'en cards I've shared with you over the month, I thought I'd finish up with a simple one.

"Hissssss"

I love this image & frame from the Graphics Fairy. It didn't need much to turn it into a card. Just an extra frame lifted with foam tape, some orange glitter on the moon, and the cat's eyes coloured green and covered in glossy accents. So here's a "Merry Hallowe'en" to you all!

Sunday 30 October 2011

Christmas Clean and Simple

I won a prize from the Winter Wonderland blog last week, and wanted to show willing and enter their challenge again this week, but the theme is "Clean and Simple". Well, it's definitely out of my comfort zone, but I've done my best.

"Clean and simple"

The Graphics Fairy image was used as a digi stamp and coloured with promarkers to match the shades of these chipboards that came free with a magazine, and a frame made from matching textured cardstock. The cardstock has an aperture cut out for the image, rather than the image being mounted onto the card. This gives a lovely clean edge and emphasizes the image.

Also entered for the following challenge:
ABC Christmas Challenge

Saturday 29 October 2011

A One Colour Card with Dimension

One-colour cards are somewhat out of my comfort zone, as you might have guessed by now, so this card really has been a bit of a challenge for me. The depth & texture has had to come from the use of different techniques, and there has been lots of stamping & embossing and the addition of gems, ribbon, die cuts and even drawing in this project!

"Front"

The main image on the front of the card was stamped with versamark and embossed in gold cosmic shimmer onto diecut mats of gold shimmer card. The background layer was stamped and embossed with snowflakes, and embellished with a generous width of gold mesh ribbon and lots of gold gems.

"Inside"

The main part of the card is a concertina-type tunnel card with a large gold & white Papermania sentiment behind the apertures. The reindeer at the front are Tim Holtz die cuts with gold glitter edges & gold gems for eyes. The tree was drawn with a gold brush marker, and has gold gems added for Winter fruit.

"Top view showing construction"

The apertured layers are decorated with gold diecut snowflakes and images of trees and reindeer which have been stamped, embossed and cutout from gold card.

I'd like to enter this card for the following challenges:

Simon says stamp and show one colour... any colour!
Simon says stamp challenge - anything goes
ABC Christmas Challenge

Thursday 27 October 2011

Hallowe'en shaker card

I'm so pleased today - woke up to find out I won the Samuel Taylor's challenge with this Hallowe'en card! The prize is a Tim Holtz configurations box and I've been wanting one for ages, but couldn't afford it, so I can't wait for it to arrive now :)

To celebrate, I thought I'd post another Hallowe'en card.

"Merry Hallowe'en"

During the Victorian era, cards were often sent with the message "Merry Hallowe'en". At some later point, Hallowe'en cards dropped out of fashion and the "Merry" started to appear on Christmas cards instead.

This card image is from the Graphics Fairy. I cut out an extra pumpkin head & frame and glittered in behind the pumpkin face to make the eyes & mouth glow, then added acetate and foam tape to the second frame and Hallowe'en-coloured sequins in behind for shaking before trimming to size and fixing to the front of a card blank.

"Merry Hallowe'en" from Mr. Pumpkin Man!

Entered for the following challenges:
Crafty Cardmakers
Crafty Boots
Haunted Design House
The Shabby Tea Room
There She Goes
Creative Inspirations Paint
The Crafty Pad Designs
Basic Grey Challenges

Monday 24 October 2011

Twas the Night Before Christmas...

There is a famous poem which begins "Twas the night before Christmas...". This object is inspired by that poem and features three scenes from a vintage book provided by the Graphics Fairy.

"Twas the night before Christmas..."

Each scene was printed onto cream card and parts highlighted with a white gel pen and some glitter glue, before framing with embossed gold card and acetate.

"Back view"

The back of each panel has a verse from the poem printed onto cream card, cut out with nesties, then inked & stamped with a repeated small snowflake in Bundled Sage distress ink.

"And then, in a twinkling, I heard on the roof
The prancing and pawing of each little hoof,
As I drew in my head, and was turning around,
Down the chimney St Nicholas came with a bound."

The flowers are made from deep red organza die cut with Tim Holtz' Tattered Florals die and edges singed with a heat tool, then held together with a jewel brad.

"He was dressed all in fur, from his head to his foot,
And his clothes were all tarnished with ashes and soot,
A bundle of Toys he had flung on his back,
And he looked like a pedlar, just opening his pack."

The panels are joined together with book rings threaded through eyelets.

"He spoke not a word, but went straight to his work,
And filled all the stockings, then turned with a jerk,
And laying his finger aside of his nose,
And giving a nod, up the chimney he rose!"

Finally, lengths of Christmas-coloured ribbons are tied to the bookrings for added decoration.

Entered for the following challenges:

Saturday 22 October 2011

Stripes

Well, this week Simon said show some stripes, so here they are:

"Stripes"

The papers and chipboard are from Kaisercraft's "Secret Bird Society" collection, one of my favourites.

Friday 21 October 2011

There was an old woman who lived in a shoe...

I wonder how many of us remember all those nursery rhymes from childhood, and whether they are still being passed on to the new generations. This one always confused me. Were the old woman and all the children really small, or was there an enormous shoe somewhere? The origins of this nursery rhyme seem to be shrouded in mystery, so I guess we'll never know :).

"There was an old woman who lived in a shoe..."

The image was decoupaged from the Graphics Fairy original and lines from the nursery rhyme were printed onto a frame. A second frame was added from gold card with some peel-off borders. They are straight really, the scan made it look all wonky for some reason - mind you, I feel all wonky with a cold, so I guess it matches in a funny sort of way :).

Other things I used to lie awake at night worrying about:

If someone went to all the trouble of building the “old lady who had so many children she didn’t know what to do” a shoe to live in, why didn’t they just build her a house in the first place?

Was she the same old woman who swallowed a fly?

Where did the mouse go when the clock struck one?

Why did Mary have cockle shells in her garden?

Why did the little boy flush his wool down the loo (for some strange reason that I can’t fathom, I thought that was what “lived down the lane” meant!)?

Entered for the following challenge:
Simon Says Stamp

Wednesday 19 October 2011

Hallowe'en in Wonderland

Of the gorgeous things I bought at the Belfast Craft Show last week, the Graphic45 papers inspired me first. I started playing with them as soon as I got home, and came up with this card for this month's Altered Alice Challenge which celebrates the Mad Hatter's birthday in the US (6th October in America and 10th June here, after the 10/6 in his hat!). In the book, the Mad Hatter sings "Twinkle, twinkle little bat..."

"Hallowe'en in Wonderland"

This was also the first card I made with my new Hougie board; the folds for the stepper card were a breeze! I used small pieces of black velvet ribbon tied into the top of each of the Graphic45 tags to look like bats, and the main image is a digitally altered Graphics Fairy image coloured with promarkers to match the tags. The bats were also downloaded from the Graphics Fairy. A couple of bats were adhered to thin strips of acetate and the acetate fixed to the card so the bats can fly.

Also entered for the following challenge:
Crafty Boots

And check out this mega candy

Monday 17 October 2011

Robin and the Blue Tits

Robin and the Blue Tits. Sounds like the name of a 60s band.

"Robin - front of card"

But no, it's a Christmas card using Graphics Fairy images...

"Blue tits - inside of card"

and a tunnel of die-cut glitter card snowflakes.

"Top of card showing construction"
Hope you like it!

entered for the following challenges:
Winter Wonderland

Sunday 16 October 2011

Blue tit Christmas

I finally made a start on my Christmas cards this week and thought I'd share this one with you first.

"Blue Tit Christmas"

Birds always make good subjects for cards and this fabulous Graphics Fairy image is no exception to the rule. The sentiment was cut from another vintage image, and the acetate tunnel construction gives lots of depth to add extra blue tits flocking around the crumbs. There's even one peeking at you from behind a snowflake in the bottom right of the card.

"Top of card showing construction"

This same image has been used on a few cards and there's a better one for you tomorrow if you fancy another visit :)

Entered for the following challenges:
Crafting When We Can

Saturday 15 October 2011

A card with one of Lee's flowers

Lee aka craftyloops very kindly gave me some of her gorgeous flowers and after cooing over them and stroking them for a few weeks I finally made myself put one on a card, so here it is, and the flower is the star!

"Lee's flower card"

I love this flower - it has so much dimension and is really soft and fluffy!! The background paper was also given to me (in a goody bag from Karen aka Redrottie on Docrafts - thanks Karen), so my only contributions are the ribbons and cardstock!

"Lee's flower card - inside"

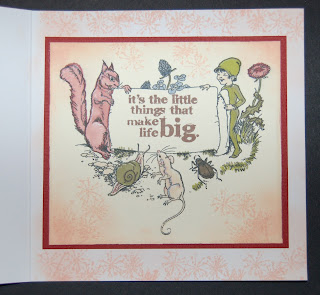
I thought this Graphics Fairy image would make a nice surrounding for the Tim Holtz sentiment inside the card. The image was coloured with promarkers and framed with dark red cardstock, and a few meadow flowerheads stamped with distress inks around the outside.

Thanks for looking :)

Thursday 13 October 2011

A quickie card with alcohol inks

I love the effects you can get from playing with a set of Adirondack inks onto silver mirri card. The colours are so vibrant!
"Fly High"

Some of the coloured card is die cut using the Tim Holtz' rosette strip die, alphabet set and a Sizzlit swallow. A plain piece of mirri card is embossed and used as a background for this simple card. The colours are so beautiful I don't think anything else is needed.

Owls and witches and black cats

Sometimes I think I'm turning into a one-woman advert for the Graphics Fairy, but her images are so good and she's so generous letting us use them for free. This Hallowe'en card features more of her images


"Hallowe'en card front"

It's hard to see in the photograph, but the main image is decoupaged and highlighted with glitter, especially the witch's eyes and the pumpkin cut-outs. That's a very large, fat owl there. Guess he must have eaten a lot of mice! Now where is that black cat...?


"Hallowe'en card inside showing pop-up black cat"

He pops-up out of nowhere - this card uses the Sizzix twister pop-up die for the mechanism, so as the card is opened, the cat twists round to face you. Some of my precious Tim Holtz' Lost and Found paper stash was used for the lettering - the grungy look goes quite well with the feel of the card. The cat's eyes were highlighted in promarker and then covered in glossy accents. He looks just like our little Lucky :)

Tuesday 11 October 2011

The Bat Cave

Alizabethy left a comment on my Horrible Hallowe'en card that gave me the inspiration for this card. She called it a "bat cave" and I thought, "that gives me an idea..." :)

"The Bat Cave - front of card"

The front of the card features a free Graphics Fairy image with some orange glitter on the moon for extra sparkle, and a little purple glitter around the edges of the silhouette to help it stand out from the background (pearlescent black card).  The lettering uses the Vintage Market Sizzix alphabet strip, with my usual two sets of letters cut (this time in silver and orange) to add dimension.

Enter if you dare...

"The Bat Cave"

This card has the concertina-type tunnel card construction with apertures cut using Spellbinders label dies and liberal sprinklings of Graphics Fairy bats of all shapes and sizes, including two bat ladies!


"The Bat Cave - top of card showing construction"

Sleep well :)

Entered for the following challenges:
Clear it Out
Everybody Art
Scrap Creations
My Time to Craft
Shopping Our Stash
Craft Spot By Kimberly
Stamps & Fun = Creativity
Victorine Stamps

Monday 10 October 2011

Not too scary - another Hallowe'en tunnel card

Just a quickie this evening. I made this "not too scary" Hallowe'en card for my m-i-l. The cat looks so like our little one, I just love it! The image is from the Graphics Fairy, and the other embellishments are from a pack of stickers I bought in a Supermarket last year. mil wants me to add a nose :)

"Not too scary Hallowe'en tunnel card"

Sleep well and I'll upload a scary one tomorrow :)

Happy Birthday Rose - 100 today!

A friend asked me to make a card for a lady she goes to visit in a Nursing home who is 100 years old today! This card was such a joy to make. Every minute I was making it I kept thinking about what it would have been like to have been born 100 years ago, when Lloyd George was Prime Minister and there were hardly any cars on the roads.

"Box for Rose's card"

I thought I'd start by showing you the finished box. It is made from cream card decorated in shabby chic style with resist roses, distress inks and Perfect Pearls and finished off with lots of organza ribbon.

"Box for Rose's card with ribbon removed"

Just to add a little suspense, here's the box without the ribbon. The central bunch of roses is stamped in barndoor distress ink and coloured with promarkers.

"Box detail showing stamped roses"

Here's a detail from the box lid showing the resist roses and coloured roses - the stamps are from an old Papermania set. OK, time to open the box...

"Rose's 100th birthday card - front"

It's funny, but I had the design all worked out and the card half-made before I found out Rose's name. Serendipity!

"Rose's 100th birthday card - inside"

Well, there had to be a big "100" in there somewhere.


Happy 100th birthday Rose! What changes you have seen in your lifetime. I wonder what the world will be like in another 100 years.