Friday 31 May 2013

Happiness

One of the things that never fails to make me happy is covering old boxes in pretty papers. Simon Says Stamp and Show's challenge this week is "Into the Woods", and what better than to show you one of my altered boxes? One of my husband's great grandfathers was a cabinet maker, and my husband rescued this old box from being thrown out some time ago. I came across it in the loft last week and begged it for my desk - it's just the perfect size to hold all my distress ink pads (it's a BIG box lol!).

"Old Wooden Box"

As you can see, the box has seen better days. Bits of it were coming apart and needed repairing with plenty of PVA.

"It has a lid..."

Also, I don't think they could have discovered the right angle in those days lol!

"...and a drawer!"

So I didn't feel too guilty about losing the wooden look :-)

"Finished box - the outside"

Since the box will be living on my desk, and I share an office with my husband, I had to pick some papers we both like. Luckily for me, he loves the Graphic45 Birdsong collection.

"Front"

My best friend Lee aka craftyloops sent me this fabulous "diamond" knob, so I got Tom to drill a hole in the drawer for it (he's got all those "man" tools for jobs like this lol!). Thanks Lee, it is just perfect :-)

"Front corner showing side"

The "twiddly bits" are all painted with black acrylic paint.

"Inside"

Yes, the inside is decorated too! Well, I had to do something to cover all the cracks :-)

Entered for the following challenge:
Simon Says Stamp and Show... Into the Woods

Saturday 25 May 2013

Tim Holtz Tags of 2013 - May

That's weird, there's a strange golden orb in the sky. What? The Sun you say? Here in Northern Ireland? Surely not. But could it be...well, apparently we are having our one day of Summer today when the temperature struggles into double figures and the world and his wife get their barbecues out. So, a good day to share my entry for Tim Holtz gallery of tags. This month we are playing with rub-ons. I dug out a couple of sheets of old Papermania rub-ons I've had for ages and then played with my distress inks and came up with this tag.

"Sun"

There's nothing I like better than sitting in the garden on a warm, sunny day with a book. OK, so I don't actually own a hammock (or any pink wellies for that matter), and it isn't really warm enough to sit outside either (this is Northern Ireland, didn't I mention that lol!), but I can dream as well as the next woman.

"Tag"

This was a little metal tag from a dog collar that I painted with distress paint and added some rub-on letters to.

Ingredients:
Papermania Summer Bloom and Honey & Hugs rub-ons
Distress Inks & Paints
Olive Archival ink pad
Tim Holtz stamp sets
Spellbinders Just Swingin' die
Paper flowers
 
I liked the design from the tag and thought I'd see what it looked like as a card. Trouble is that I didn't have any more rub-ons, so here are the results of an experiment with stickers and stamps.
 
"Stickers"
 
This card uses the same images from a sticker sheet. I've added one of my favourite Crafty Individuals stamps to the background to give a little bird sitting in the branches.
 
"Stamps"
 
 
...and here it is again, this time stamped with crimson archival and heat-embossed in clear before inking as before.
 
The inked background for all three of these creations is my favourite combination of Tumbled Glass and Bundled Sage applied with bits of Cut 'n' Dry foam. Simon Says Stamp and Show are challenging us to use our favourite ink pad this week. Hopefully they'll let me get away with two favourites :-)
 
Just before I go, a quick hello to May from Gemini Crafts at Gracehill in Ballymena. We had a great afternoon getting all inky with distress inks and perfect pearls yesterday. She has some fab stuff in her shop and it's well worth a visit. Have a great weekend everyone! Maddy xx
 
Entered for the following challenges:
Simon Says Stamp and Show - Favourite Ink
Tim Holtz May Tags

Tuesday 21 May 2013

Tuesday Technique - A note on my favourite adhesives

Lots of people have been asking about adhesives lately, so I thought you might like a note on my favourites.

PVA

You may have noticed that I like to make cards that are a bit different to the norm and often need to glue pieces of card together to make dimensional shapes. My favourite glue for this sort of construction is PVA. Once set, it is not going to come apart. I just use a cheap 99p for 118ml pot from Dunelm Mill branded "Craft Factory" which has a great spreader and stand so you can store it with the nozzle at the bottom of the pot.

"PVA"

Many of the more expensive branded glues are just PVA diluted with water to a greater or lesser extent. I also use PVA for matting and layering, taking care not to spread too much glue (you just want a thin smear).

Ranger Inkssentials Glossy Accents

Occasionally, for example when constructing the "pages" in a book card, I want a glue that sets more quickly. Then I will reach for my bottle of Glossy Accents. Glossy accents would suffice for most of the times when PVA is used above, but it is a lot more expensive at approx £5 for 68ml.

Pinflair Dimensional Glue Gel

When a bit of dimension is required, for example if you want to raise an image from a background, little blobs of Pinflair dimensional glue are ideal. I also use Pinflair for attaching bulky embellishments such as charms to cards, and for constructing some paper flowers. Pinflair can take a good while to set, especially if you are using large quantities, so set aside projects to dry overnight. I use Pinflair rather than a cheaper silicone glue mostly because it doesn't smell bad. You can also get a syringe to use with the glue making finer applications possible.

Claudine Hellmuth Matt Multi-Medium

This is fabulous when you know you are going to end up with glue everywhere and you don't want it to show! I use it a lot for sticking detailed diecuts to collages, and also for tissue paper. Any excess glue dries matt so it doesn't notice. You can also use matt multi medium for transfer techniques (transferring laser-printed images onto canvas for example). The glue dries very quickly and is best applied with an old paintbrush (I keep one just for use with glue).

Speciality glues

You need a speciality glue for certain techniques such as for use with gilding flakes (something like IndigoBlu's "FlitterGlu" for example). This type of glue stays sticky for a long time. I also use a speciality glue for stamping and adhering glitter. There are various types, such as embossing powder glues, but my favourite is a glue pad.

Foam Tape

Foam tape is useful for raising large areas such as images when matting and layering, and is also invaluable for frame cards and shaker card frames. Be aware though that the adhesive on tapes can dry out, so it may not be a permanent bond.

Double-sided (ds) tape

Many people use ds tape and swear by it, but in my experience it dries out and can cause your cards to fall apart. It may be the case that I have just been unlucky with the brands I've used, but I never risk it any more.

Saturday 18 May 2013

Tim Holtz Hardware Findings Note Book Binding Tutorial

Making all those skewer bindings last week got me thinking there must be an easier way to bind the covers, and I came up with this. Hope you like it!


1. Cut 3 straps and one keyhole each from recycled card packaging and good quality black card.


2. Glue the black card pieces to the patterned side of the recycled packaging pieces using a good layer of PVA and leave to dry.


3. Pass all the pieces through an embossing folder the wrong (brown) side up.


4. Flip all the pieces over and dry emboss them again. This will help to break up some of the paper fibres and make the straps more flexible so they will bend without tearing or cracking.


5. Go over all the edges with the chisel end of a black promarker.


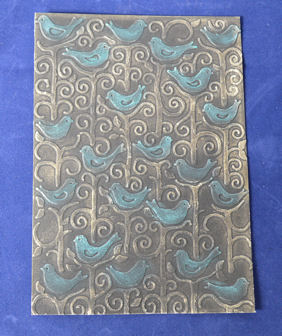
6. Bring out details of the embossed design by rubbing with gilding wax.


7. Use a thick pen to roll the straps around, giving them plenty of flexibility before fixing to the covers.


8. Cut two pieces of thick recycled card packaging 5" x 7"


8. Prepare two 5" x 7"covers using the gilding an embossed image technique and glue to the card pieces using a good layer of PVA. Leave to dry.


9. Layout the straps and keyhole on the covers and punch small holes in the covers to match the holes in the diecuts (I use an 1/8" eyelet punch), then attach the straps using brads.


10. Open out the brads on the wrong side to hold everything in place.


11. Cover the insides with patterned papers (hiding the brads) and add some gold thread to hold the contents in place.


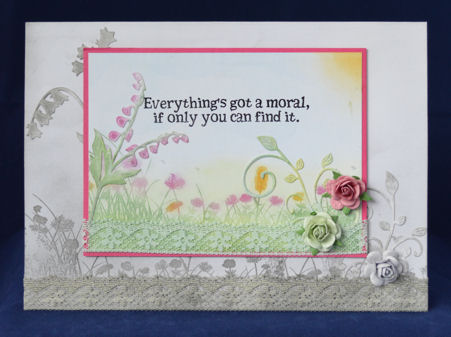
12. I filled this one with a selection of A6 handmade cards and envelopes. Once they are used, the recipient can still use the cover for notes.


So there you have it, a Christmas present for an 18 year old boy!


14. And a matching one for his girlfriend (my niece) :-)

Ingredients:
Tim Holtz Sizzix Bigz Hardware Findings, Tag and Bookplates
Spellbinders Die D-Lites: Floral Border, Bluebells and Lily of the Valley
Spellbinders Butterfly
M-Bossabilities Large Folder: Venetian, Tweet and Twigs
Tim Holtz Sizzix Embossing Folder:
Cuttlebug Embossing Folder: Mesh
 Papermania Oriental Treasures A4 paper pad
recycled card packaging
cardstock: black 220gsm,
Creative Expressions gilding waxes: enchanted gold, patina
black promarker
gold aquamarker
selection of handmade C6 cards and envelopes
brads
gold thread
adhesives: PVA, Glossy Accents


Thursday 16 May 2013

Double skewer hinged notelets set

This is a project using the double-hinged skewer binding to hold a set of stamped notepaper and envelopes. Another Christmas present for my shelf!

"Notelets Set"

The covers use the "gilding an embossed image" technique, and there are also gilded diecuts cut from black card. I love that vintage frame sepellbinders die and use it a lot. It's perfect for some of these Graphic45 images cut from the 8" x 8" patterned paper pad.

"Stamped Notepaper and Envelopes"

The notepaper and envelopes are held in place with some gold thread secured behind the patterned paper when it was stuck inside the covers.

"Patterned Paper Lining"

The Graphic45 8" x 8" papers are perfect for lining the 5" wide covers. Cut a sheet vertically in half to give two pieces 4" wide and that leaves a one inch border either side to fill up using any of their complementary patterns. I stick mine down with a good smear of PVA and leave to dry.

"Stamped Papers"

My friend Brenda was saying the other day that she wanted an excuse to get her oriental stamps out. It gave me the idea for the notepaper set! Hope to see your stamps get an outing soon Brenda :-)

Ingredients:
Graphic 45 8" x 8" paper pad: Birdsong
Papermania Oriental Treasures A4 paper pad
Spellbinders Vintage Frames
Spellbinders Die D-Lites: Floral Border, Bluebells and Lily of the Valley
recycled card packaging
cardstock: black 220gsm, white 160gsm cut into A6 (for stamping - take an A4 sheet, cut in half to make 2 x A5, then cut in half again to make 4 x A6), gold mirri card
black promarker
gold aquamarker
selection of stamps and inks to decorate notepapers and envelopes
C6 white envelopes
gilding waxes: patina, enchanted gold
brads
thick pencil
gold thread
decorative ribbon
adhesives: PVA, Glossy Accents

Tuesday 14 May 2013

Tuesday Technique - Making Holes in Poured UTEE Shapes

While I had the melt pot to dip my bird into last week, I made some more UTEE embellishments and thought I'd share my method of making holes. As luck would have it, there are plenty of bits of bamboo skewer lying around here (now, I wonder why that could be lol!).

All you need is a melt pot, some UTEE, a skewer or cocktail stick, cookie cutter and versamark pen. Use the brush end of the pen to go over the inside & cutting edge of the cookie cutter and the blunt end of the skewer or cocktail stick. Working on a craft sheet over a heatproof surface, pour UTEE onto the craft sheet, push the cookie cutter down into the hot UTEE and quickly stand the stick into the hot UTEE, inked end down.

"Making a Hole in Poured UTEE"

Leave to stand until set (it only takes a couple of minutes). Check for a set with the edge of your spatula, not your fingers! Once set, pick up, remove the outside and push the shape out. Remove the stick, and this is what you get:

"UTEE Shape with a Hole!"

You can also drop charms and beads into the hot, poured UTEE for extra decoration...

"Charms Embedded in UTEE shapes"


I leave you with pictures of some of the other UTEE things I made in this mega melt-pot session.

"More Circles"

"Rectangles, Easter Eggs, etc."


"Shapes from my homemade moulds"

Loving the new UTEE colours, and as you can see I used up all my dregs of old pots of embossing powder to make some different colours. Hope you all have some crafting fun today! Maddy x

Sunday 12 May 2013

Live Your Life in Colour

I have some more gilding wax projects to share, but thought we'd take a break today and have something colourful to celebrate the arrival (and departure!) of Spring :-)

"Live Your Life in Colour"

There's a new craft shop in Ballymena - wayhay! It's called Gemini Crafts and the lovely lady who runs it, called May, is as mad and enthusiastic about papercrafting as me! We could hardly stop talking long enough for me to buy some crafty stash, but this card has a few things on it that I bouight from her. Also, she sells Pan Pastels and IndigoBlu stamps, as well as loads of distress stuff, so you can imagine I am very happy about that! So, a big shout out to May and I wish you every success in your venture.

The background for this card is in monotone and stamped with the same stamps as the main panel.

"Pastels"


I love the IndigoBlu nature stamps, and reach for them constantly when stamping. This poppy meadow background stamp is just gorgeous. The scene is coloured with pan pastels, stamped in versamark and the ink rubbed with more pan pastels to get a soft, colouring effect. Diecuts and the grey lace are also coloured with pan pastels. The soft green lace is the colour that it was when my good friend Lee gave it to me - she scored some real vintage lace, and it's wonderful stuff!! Thanks Lee :-)

Ingredients:
IndigoBlu stamp sets: Alice II, Poppy Meadow
Pan Pastels
versamark ink pad
Cheery Lynn flourish (can't believe how easily this cuts out!)
Spellbinders Die D-Lites - Bluebell & Foxglove
Hobby House flowers
cardstock: white 300gsm & 160gsm, pink 160gsm
vintage lace
adhesives: PVA, Pinflair
 
Entered for the following challenge:
IndigoBlu Forever 21 - Challenge 3 Flowers

Wednesday 8 May 2013

Feather Your Nest

Yesterday, I promised you another project using "gilding wax on dry embossing". This is my entry for Craft Stamper's blog challenge: Make it, Take it - Challenge Two. We had to use the "Ripping And Tearing technique, demonstrated so beautifully by Helen Chilton on pages 78 - 81 of the May 2013 issue".

"Feather Your Nest"

The background is dry-embossed black card rubbed with different colours of gilding wax to bring out the texture. The top layer has the centre cut and ripped open to reveal a second layer beneath. Gilded diecuts were added over the background using Claudine Hellmuth matt multi-medium, which adheres to the wax and dries without leaving any glossy streaks.

The bird is stamped using jet black archival ink onto card that was previously decorated with distress paints. After cutting out, the bird is dipped into molten clear UTEE in a melt pot. After setting but whilst it is still warm, Perfect Pearls is rubbed onto the UTEE to give a metallic sheen. Straw, eggs (some gorgeous turquoise beads I picked up at Belfast Craft Fair) and the bird are fixed to the card, and a beaded jewel hung from the bird's beak.

Now, it was a rare, Sunny day here in Northern Ireland yesterday, so I couldn't resist seeing what Mr. Birdy looked like perched amongst the apple blossom...

"Chirp Chirp"

The sunlight really brings out the shine from those gilding waxes.

"Apple Blossom"

Finally, some flowers for Tom's bees to feed on!

"Cute!!!"

I thought I'd leave you with a picture of some of the newest members of our family, who hatched over the weekend. No wonder I have birds on the brain today :-) Maddy x

Ingredients:
M-Bossabilities Embossing Folder: Tweet and Twigs
Sizzix Tim Holtz Embossing Folder: Wood Grain
Creative Expressions Gilding Waxes: Enchanted Gold, Patina, Amethyst
Martha Stewart stamp set: Birds
Ranger Archival Ink: Jet Black
Distress Paints
Clear UTEE
Straw
Beads & Findings
adhesives: Claudine Hellmuth Matt Multi-Medium, PVA, Glossy Accents

Entered for the following challenge:
Craft Stamper Make It, Take It, Challenge Two - Rip and Tear Technique

Tuesday 7 May 2013

Tuesday Technique - Gilding an embossed image

You may have noticed  all the metallic-looking embossed covers I've been using lately. Today I thought we'd have a look at the very simple technique used to create them.


1. Start off with a piece of black card cut to size and emboss using an embossing folder and roller-type machine.


2. Choose a colour of gilding wax and gently rub onto a raised area, picking out an aspect of the design.


3. Colour similar parts of the design with the same colour


4. Continue until you have completed a section.


3. Repeat steps 2-4 using a different colour of gilding wax.


4. Rub some gold gilding wax around the outside of the card to create a frame.


5. Buff any excess wax with some kitchen roll, and here's the pair of covers from yesterday! It's hard to show the metallic shine from this technique in the photographs, but you should get the general idea. I stick them down with a layer of PVA to the patterned side of recycled dog food boxes to make good thick covers.

I hope you'll come back tomorrow to see one of my weird and wonderful creations made using this technique! Have a great day everyone. Maddy x

Ingredients:
cardstock: black 220gsm
gilding waxes: Creative Expressions patina & enchanted gold
Embossing folder: M-Bossabilities Tweets & Twigs