Thursday, 26 July 2012

Ladies' Diary Stepper Card 4

It's always "time for tea" in our house. I keep the teapot warm and it's a magic never-ending pot (well, that's what everyone thinks anyway :-) No tea on this card, but I love the clocks and flowers background paper and thought I'd go with the flow for the theme.

"The Clock's Ticking"

That central flower is a fab shabby chic tattered rose made with lots of inky fingers, spraying homemade distress ink + perfect pearls ink sprays onto damp & crumpled cardstock diecuts before leaving to dry and assembling with a big sparkly blingy brad in the centre.The other little flowers are diecut patterned papers with more of my patterned buttons in the centres.

The clock is diecut from foamboard and decorated by dabbing with gold Adirondack mixative using the Ranger tool & a felt pad.

"Thinking of You"

I love the way these sentiments turn out diecut from foamboard, stamped and heat-embossed. "Thinking of You" is from a Sizzix / Hero Arts die & stamp set. I normally stick these on with a few blobs of Pinflair to help with adding even more dimension.

"Clock charm"

These little alarm clock charms are great. You don't need to spend a lot of money to get good charms. The ones without brand names are just as good ;-)

A couple more cards in this Ladies' Diary Collection stepper card series to go yet!

Ingredients:
Graphic45 8"x8" paper pad: Ladies' Diary Collection
Spellbinders dies: Carnation Creations, Foliage
Sizzix Bigz Tim Holtz: Tattered Florals, Weathered Clock
Foamboard
Cardstock: brown 300gsm, white 200gsm
Distress inks: Tattered Rose, Victorian Velvet, Bundled Sage, Vintage Photo
Perfect Pearls: Heirloom Gold
Versamark ink pad: clear
embossing powder: pink
Adirondack alcohol ink mixative: gold
adhesives: PVA, glossy accents, Pinflair
small alarm clock charms
large jewel brad
buttons

Entered for the following challenge:
Penny Black & More @ Allsorts - Summer Blooms
Crafty Creations - Buttons
Fab 'n'Funky - No Stamped Images
Simon Says Stamp - Anything Goes
Tuesday Alchemy - Very Vintage

Tuesday, 24 July 2012

Ladies' Diary Stepper Card 3

Number three in my Ladies' Diary Collection stepper card series features a Justrite sentiment as the main focus.

"Thank You Ladies!"

I love the way the ladies in the main panel are glancing towards the sentiment, drawing the eye in to the centre of the card. The ladies in the background are having some nice little chats about the weather and Dorothy's dress and "Oh, did you see those red shoes??"... I used a couple of homemade patterned paper buttons as centrepieces for the flatter background flowers, and the "lace" along the bottom of the card is actually a length of Graphic45 border cut from the paper pad!

"Sentiment"

The large background label for the sentiment is diecut from foamboard and heat-embossed in gold. The smaller label is stamped on a scrap of patterned paper, diecut, and the sentiment stamped in black archival ink and heat-embossed in clear. Gold aquamarker was used to add some detailing and a border, and to colour the edge of the foamboard.

"Rose"

This rose was diecut from patterned papers and assembled with shaping and some glossy accents to fix the petals. The edges of the petals are subtly coloured with some distress ink.

"Carnation"

Carnations are one of my favourite flowers and I'm always striving to make my paper ones look more realistic. The petals on this one were coloured with distress ink and crinkled with a pair of round-nosed pliers before shaping and assembling around a central brad. Flowers are usually stuck onto my cards with a blob of Pinflair which allows for some flexing once dried and gives a good bond.

Well, I hope the sun is shining where you are. Here in Northern Ireland it is still raining, but I'm doing my best to pretend it's Summer ;-)

Ingredients:
Graphic45 Ladies' Collection 8"x8" paper pad
Spellbinders dies: Labels 20, Rose Creations, Carnation Creations
Justrite Stamp Set: Thankyou Labels 20
Archival ink: Jet Black, Crimson
Versamark ink pad: clear
Distress ink: Victorian Velvet
Embossing powder: gold, clear
Letraset Aquamarker: Gold
brads
cardstock: brown 300gsm
adhesives: PVA, glossy accents, Pinflair

Entered for the following challenges:
Penny Black and More - Summer Blooms
Stamptacular Sunday - To Die For
Touch Twin Markers - Colour Challenge
DL Art - Thankful Thursday

Monday, 23 July 2012

Ladies' Diary Stepper Card 2

Another in the Ladies' Diary Collection stepper card series today. All these cards use sentiments heat-embossed onto foamboard diecuts. I've discovered that you can cut the foamboard with Spellbinders label dies and Sizzix framelits if you put it through 3 or 4 times - it wouldn't work on anything intricate, but the plain outlines cut well enough to pop out simple shapes.

"Thank You Ladies"

I love this flowery background paper and thought it would make a nice setting for a garden, so we have our ladies walking around taking the air :-)

"Morning Ladies!"


The sepia coloured figures are placed towards the back of the scene with the foreground ladies seeming closer to us by being so brightly coloured.

"Oh I say!"

One of the secrets to getting cutouts to look more realistic is not to leave any white edges. The double-sided papers are great so they don't look too silly from the back, but I also colour any edges with distress ink on cut n dry foam or with marker pens. A neutral colour like brushed corduroy works well.

"Sentiment"

The edge on this foamboard diecut was coloured with a gold aquamarker to match the sentiment. The simple flowers were made by punching small 6-petal flower shapes, making a small slit to the centre, and sticking one edge petal on top of the other to make a more 3d shape. Tiny pink gems are added to the flower centres, and also to the centres of some of the flowers on the patterned paper.

"Mind the gap"
Mind the gap. Sorry, those closing doors just reminded me of the tube train announcements for a moment :-) One of the good things about stepper cards is that if you are careful with your embellishments, they fold completely flat and can be sent in a normal envelope. I love this Heartfelt Creations gate die with the folding doors and have decorated the doors with matching papers. The matching stamps are great for scenes, but you could hide a secret message in behind there if you wanted.

Ingredients
Graphic45 8" x 8" paper pad: Ladies' Diary Collection
Justrite stamp set Thank You Labels Twenty
Heartfelt Creations Chateau Gate die set
Heartfelt Creations stamp set: Scenic Vista
Sizzix Framelits Circles
Marianne fence die
Versamark clear ink pad
distress inks
gold embossing powder
foamboard
cardstock: brown, 300gsm
adhesives: PVA, Pinflair, glossy accents

Entered for the following challenge:
Craft a Scene - In the Garden
Samuel Taylor - diecuts

Sunday, 22 July 2012

Ladies' Diary Stepper Card 1

I just love Graphic45 papers and the Ladies' Diary Collection paper pad is no exception. I've really got into making stepper cards lately and I've a few of these to share with you. The first is themed around sewing:

"She's 'armless!"

The foamboard diecut dress form is wrapped with some organza and a simple belt fashioned from a strip of scrap gold material.

"Charming"

Charms are fixed to a short length of chain with jump rings and attached to the card by threading the chain through an eyelet and fixing a large jump ring in behind to keep the chain in place.

"Button up"

I'm particularly pleased with the way the homemade buttons turned out decorated with scraps of patterned papers, especially splitting the top and bottom of the lady between two large buttons.

Ingredients:
Graphic45 8" x 8" paper pad: A Ladies' Diary Collection
Sizzix Tim Holtz Bigz Die: Sewing Room
Sizzix / Hero Arts stamp & diecut framelits: 65776 Floral
foamboard
plain buttons to decorate
adhesives: PVA, glossy accents, Pinflair
distress inks: Tattered Rose, Victorian Velvet
embossing powder: gold
cardstock: A4 grey 300gsm
charms: sewing machine, spinning wheel
jump rings
chain
eyelet
Craftime Dress it Up "A Stitch in Time" decorative button
organza
gold material

Entered for the following challenges:
Emergency Crafters: Circles
The Stamp Man - Anything Goes / Summer Colours
It's All About the Vintage - Anything Goes
Sarah Hurley - Challenge 70 Buttons
Samuel Taylor - Diecuts
The Perfect Sentiment - Anything Goes
Papertake Weekly - All Things Girly
Top Tip Tuesday - Circles
The Artistic Stamper - Circles

Tuesday, 17 July 2012

Cirque du Madeleine

Another book card today.

"Circus Book Card"

Without further ado, I give you "Cirque du Madeleine"...

"Cirque du Madeleine"

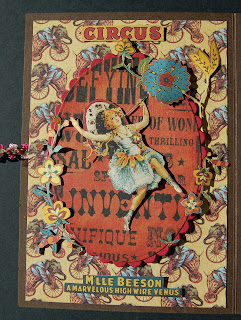
The great thing about making circus cards is that you can add as much clutter and detail as you like, it's supposed to be chaotic, that's the point of a circus!

"Inside front cover"

Wikimedia has some of the original artwork for the circus posters that these Graphic45 papers were based on, free of copyright in the commons section. Try this one for example. Always worth a look if you want to extend your stash, and great for being able to print some of the images in different sizes.

"Inside book card"
The shadows from a rare sunny moment in the UK this summer show how much dimension can be achieved with a book card.

"Trapeze artist"

The trapeze artists are stamped and coloured, cut out and joined together with a length of gold rope across the front of the book section of the card. You can just make out the lion tamer & lion in the background.

"Trio of circus performers"

I just love these guys, added from a Wikimedia commons download but a perfect match for the patterned papers.

"More trapeze artists"

Here's another trapeze act in the background.

Ingredients:
Graphic45 Le Cirque 8x8 paper pad
Graphic45 Le Cirque stamp sets
Spellbinders nestabilities: ovals, scalloped ovals
Martha Stewart edger punch
Distress inks
cardstock: brown 300gsm, white 160gsm
circus poster downloads from Wikimedia Commons, here's a third one to try
adhesives: PVA, glossy accents, Pinflair
lace & ribbon

Here are the three circus posters from Wikimedia that I have linked above. I've used parts of all these in my card if you look carefully. The images are all in the public domain:


Entered for the following challenges:
Simon Says Stamp and Show - No Rules!
ABC - T for Two (two trapeze artists joined by a rope)
Cute & Girly - A day at the... circus!
Oozak - Bright Colours
Really Reasonable Ribbon - Sizzlin' Summer Colours and Ribbon
The Cupboard Trilogy - Colour Palette

Wednesday, 11 July 2012

The Entomologist's Dream

I love Nature, and this is an ultimate nature card. It features lots of beautiful insects and a wonderful sentiment from IndigoBlu: "If you truly love nature, you will find beauty everywhere". I love the beauty in wild flowers. My mil can't understand why I have a large thistle at the back of the kitchen door, but the flowers are just beautiful and I love to watch the bees and butterflies coming to feed on it. Next time you see a weird looking fly, please try to appreciate its beauty instead of reaching for the spray!

"The Entomologist's Dream"

This card has a standard book construction with the pages sized to fit closely around the inner box.

"Front Panel"


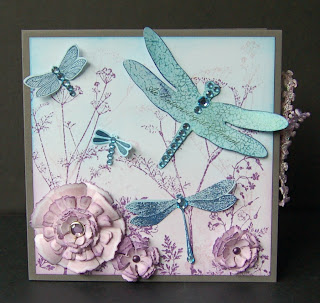
The front panel is decorated with distress inks, stamping and diecut insects and flowers which are stamped, inked and brushed with Perfect Pearls to match the background.

"Inside"

The inside reveals that wonderful IndigoBlu sentiment together with an insect collection!

"Inside Front Cover"

The sentiment is stamped and embossed in clear onto a diecut panel. Distress inks are used to give different clours to the words "Nature" and "Beauty". Lots more ink and Perfect Pearls are stamped, sponged and brushed on together with some lace coloured with distress inks to match.

"The Entomologist's Dream - An Insect Collection!"

Do you recognise the box? It's from one of those sets of Kars wooden shapes. Haven't used the shapes yet, naughty! The box is covered in ink from blue and violet metallic markers which match  Tumbled Glass and Milled Lavender distress inks quite well. Each of the insects was stamped on a small square of white card twice using black archival ink and heat-embossed in clear, then stamped again onto acetate and the wings cut out. The images were each coloured with distress inks. The bodies are cut out from one set of images, shaped with an embossing tool and adhered to the other set with Pinflair for some dimension. The matching acetate wings are shaped and attached to the stamped images at the appropriate place on each body using a dab of glossy accents.

"Mr. Bumblebee"

My other half keeps bees and along with him, they have a special place in my heart! This one was cut out and adhered onto the frame edge as if he's just visiting his old friends. Next time you see a weird insect, I hope you too can see its beauty and remember, as my old Nan used to say, "it's more frightened of you than you are of it, duck" :-)

Ingredients:
IndigoBlu stamp set: Nature
Spellbinders: Fanciful Flight, Carnation Creations, Labels
empty Kars wooden shapes box
Artemio stamp sets: insects, meadow
Sizzix & Hero Arts stamp and diecut set
distress inks: Tumbled Glass, Broken China, Milled Lavender, Dusty Concorde, Chipped Sapphire
distress marker set
white inkssentials pen
archival ink: Jet Black
embossing powder: clear
gems: pale blue self-adhesive
brads: violet jewel, Papermania Midnight Fairytale embellishment set
cardstock: white 160gsm, grey 300gsm
adhesives: PVA, glossy accents, Pinflair
lace
acetate

Entered for the following challenge:
Simon Says Stamp and Show - layered (this piece really is in keeping with the layered challenge - layers of meaning as well as of art!)
Try it on Tuesdays - Bingo (Brads, Flower, Diecut) plus Add a Butterfly
Stampalot - What's Your Crafty Passion?
That Craft Place - Anything Goes

Monday, 9 July 2012

Book Card Tutorial & Steampunk Card

"Steampunk Book Card"

Marie-Louise left a comment on my blog asking for a book card tutorial, so here it is just for you. Now, I'm one of those English forty somethings who were supposed to grow up in metric times, but had to become bilingual in imperial to survive, so naturally I tend to use a mixture of imperial and metric measurements. I hope this doesn't confuse too much. It's just that half-inches work really nicely for the folds here, and are easy enough to work with if you have a Hougie board or similar device that has half-inch crease marks. If not, work in multiples of 1cm instead of half an inch to make life easy for yourself.

"Two pieces of A4 cut and folded"

To make the book part of the card, cut two pieces of A4 card to 8 inches wide. Next cut each into two pieces that will make two edges of the book. Measurements can be adjusted as desired to make book cards of different sizes. The measurements should be slightly smaller than those of the finished book. Here, the two pieces are cut to 14.8cm and 10.5cm. Looking at the picture above, the two bottom pieces are discarded, the top two pieces measure 8 inches along the top and 14.8cm down the side, and the middle pieces measure 8 inches across and 10.5cm down the side. Take each of the book pieces in turn and crease every half inch parallel to the shortest sides as in the picture above.

A scoring board is really essential for making accurate folds for this type of card.

"Four pieces that make up the book pages"

Next, discard the two bottom pieces and concertina-fold the remaining pieces with alternate mountain and valley folds as above.

"First corner"

Take one short and one long piece and interleave the corners.

"In place"

Wiggle the corners gently into place until the two edges sit at right-angles.

"Gluing into place"

Lift the top edge and place a little glue in the corner, then hold until it sticks. Glossy accents dries and holds quicker than PVA, but either will work. Turn over and glue the bottom edge. There is no need to glue any of the other pages, they will hold be held in place by the tight folds.

"Second corner"

Take the remaining short piece and wiggle into the other end of the long piece before gluing as above.

"Final piece"

Wiggle the last long piece into the two remaining corners at the same time and glue into place.

"Covers"

Cut one background piece for the book pages to fit (14.8 x 10.5cm = A5), and a second long piece of thick card from which to make the covers, 24cm x 15.3cm. Make a crease parallel to the shortest side of the long card, 11cm in from each end.

"Assembled book card"

More panels can be added to the outside and inside covers as desired. Pieces of lace, ribbon or twine can be glued between the panels and the covers to provide closures as in the following example:


"Happy Birthday"

For this card, I've left the outside cover plain to look like a real book and just added a couple of peeloffs to resemble gold-leaf.

"Steampunk Birthday"

The fun of the book card is in the dimension that can be added to the inside. The edges here have been made with 1" folds for a wider border, and the outer card folded in the other direction to provide a frame for a landscape-oriented decoupage scene from the Graphics Fairy.

"Decorative panel"

As well as the twine glued between the covers and decorative panels to provide a closure, a second length of twine has been added to tuck some tags into, providing a space for the sender to write a message.

"Tags"

The tags and decorative panel are decorated with inks and stamps to match, with masking and perfect pearls for added interest. Matching lenths of twine are added to the tags.

"Yeeha Mr. Steampunk Man!"

The decoupage panel is adhered behind the book pages with a border of hammered gold card covered with diecut gears.

Ingredients
cardstock: 2 x white A4 220gsm, 1 x brown A4 300gsm, 4 x cream A5 160gsm
distress inks
archival ink
Papermania Hampstead stamp set
Tim Holtz Cityscape stamp set
Creative Expressions Vintage Aviation & Vintage Treasures stamp sets
Spellbinders Sprightly Sockets
Graphics Fairy image printed out x 4 for decoupage
adhesives: PVA, glossy accents, Pinflair
twine
gold peeloffs: chain border & "Happy Birthday"
Hougie Board & creaser

Entered for the following challenge:
Dream Valley Challenges - Anything but Square
That Craft Place - Anything Goes
Here Come the Boys - Tag on a Card
Card Makin' Mamas - Rubber
Samuel Taylors - Die cuts
Papertake Weekly - Anything Goes
Top Tip Tuesday - One for the Men

Monday, 2 July 2012

Butterflies Flutter By

It was my birthday recently and I treated myself to a few bits and pieces. One of them was Tim Holtz' amazing butterfly die.

"Butterflies Flutter By"

A triple stepper card shows it off beautifully. To leave enough room on the centre panel, the side panels are cut to 3cm wide rather than my usual 5cm. The base is made from grey card and edged with gold aquamarker. Panels of patterned paper are cut to size and edged with distress ink before gluing in place with PVA.

"Butterfly and Flowers"

The butterfly and flowers are diecut from foamboard and decorated in distress stickles and patterned papers. The central portion of the butterfly has patterned paper added on top and is decorated with a thick layer of glossy accents. This is left to dry completely before adhering to the card.

"Edges"

The edges of all the foamboard diecut pieces are painted with gold aquamarker.

"Finished Card"

Smaller versions of the flowers and butterflies are added to the side panels.

Ingredients:
Sizzix Bigz Tim Holtz Fanciful Flight, Tattered Florals
Marianne Creatables Butterflies
Graphic45 Tropical Travelogue 8" x 8" paper pad
black foamboard
cardstock: grey 300gsm
gold aquamarker
Distress Ink: Walnut Stain
adhesives: PVA, glossy accents, Pinflair

When I saw Simon Says Stamp and Show's theme this week I had to show you this second version of the butterfly card made using Dyan's Dylusion Sprays:

"What a difference the colour makes"

Where the first version is grungy, the second hits you right between the eyes! The basic construction is the same, but this time the card for the butterfly starts out white and is decorated by spraying with a variety of dylusions inks and leaving to dry completely before diecutting and assembling the pieces onto black foamboard diecut backing.The central portion is again decorated with glossy accents, and smaller butterflies are diecut from scrap pieces of the ink-sprayed card.

"Flowers"

The flowers & foliage are diecut from scraps of matching patterned papers, the edges inked with distress inks, and then assembled with brads before attaching to the card with Pinflair.

"Rose"
Some extra shaping on the petals makes this rose more realistic.

Ingredients:
Sizzix Bigz Tim Holtz Fanciful Flight
Marianne Creatables Butterflies
Spellbinders: Carnation Creations, Rose Creations, Foliage
Graphic45 8" x 8" paper pads: Tropical Travelogue, Le Cirque
black foamboard
cardstock: grey 300gsm, white 160gsm
gold aquamarker
brads: orange, blue
Distress inks: Walnut Stain, Spiced Marmalade, Chipped Sapphire
Dylusions Spray Inks: Postbox Red, Pure Sunshine
adhesives: PVA, glossy accents, Pinflair

Entered for the following challenge:
Simon Says Stamp and Show - Spritz, Spray or Stencil
Joanna Sheen - Summer Daze
Penny Black at Allsorts - Summer Blooms
Allsorts - In Bloom
Crafty Cardmakers - Make Your Own Flowers
Lawnscaping - Use Dimension
Crafty Bloggers Network - Anything Goes