Showing posts with label birdhouse. Show all posts

Wednesday, 18 April 2012

Birdcage book card

Finally I can reveal my secret today. Those lovely people at Penny Black and More have chosen me to be one of their two featured artists this month!! This post is to say thank you so much to the design team for choosing me - it's been a real boost. Another piece of good news this week was that I found out I won the Sarah Hurley Challenge as well, so more thank yous are in order to you too!
So, on to today's card. I've been trying to get a bit ahead on my birthday cards and this one is for my mil. She's promised not to peep beyond the first picture :-).

"Birdcage book card"

The background panels for this card are all made using distress inks and a wonderful birdy stamp set from Crafty Individuals.

"Front panel"

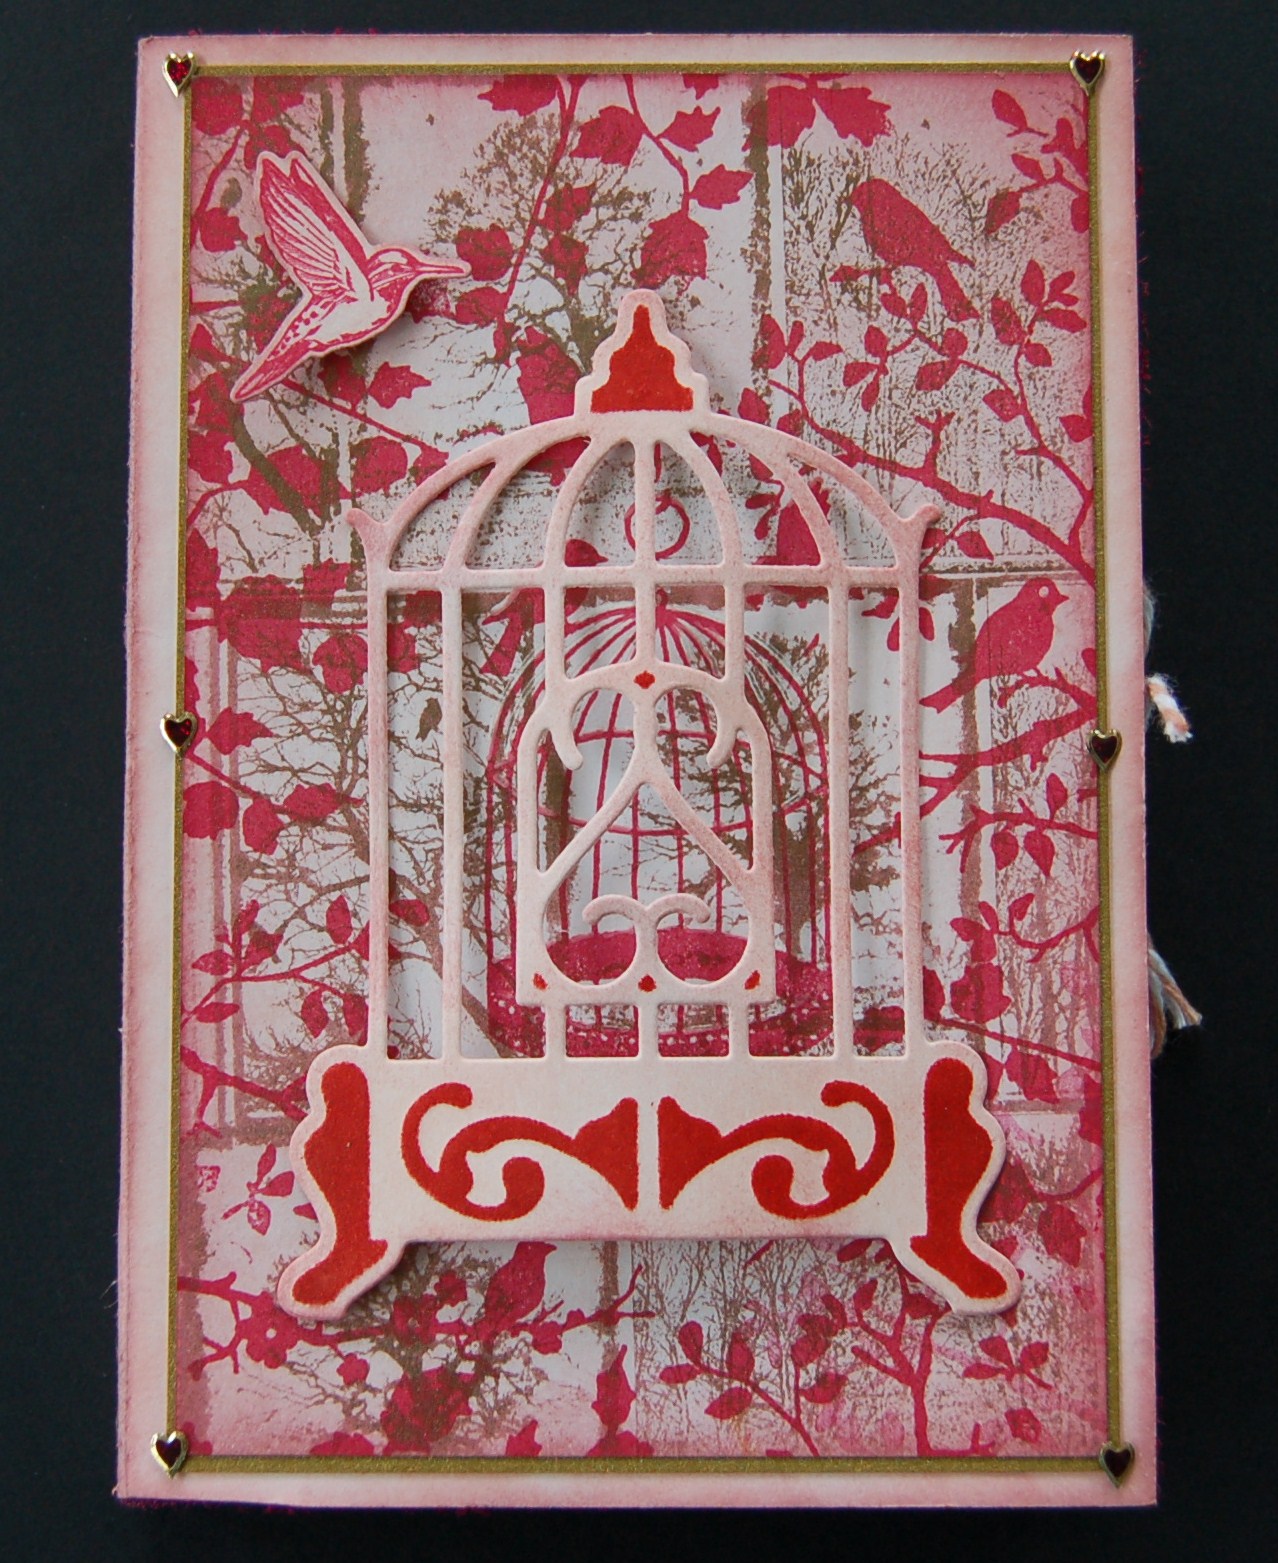
A second Crafty Individuals stamp set with lots of trees was used to provide a backing with lots of Perfect Pearls in gold, and this was overstamped in Crimson Archival Ink using the bird stamps. A diecut birdcage and bird add some dimension, but I love the way the stamped birdcage bars show through the gaps in the birdcage die, like an old-fashioned double-layer cage.
"Front panel - non shiny photo!"

This second photograph shows the stamping without the glimmer. You can see how I've stamped the tree panels in three rows, varying the order in each row to give some extra interest. The foreground stamping uses parts of the bird & branch stamps in different directions to give the effect of looking through all the layers of a woodland.

"Inside with tags"

Moving on to the inside of the card, the same C I birdy stamps were used on the background panels, this time with lots of gold Perfect Pearls for plenty of glamour. Various free Graphics Fairy images were used for the birds on the right and the birdcage on the left (just printed, cut out, shaped with fingers and stuck with Pinflair for some dimension).

"Right-hand side faux book panel"

Yay, I finally got hold of a Tim Holtz birdcage die! It was used here to diecut some gold, hammered card. Some lace was wound up the bars of the cage (the ends of the lace are secured out of sight with glossy accents). Jump rings are added to the top of the cage and glued into the folds of the book with glossy accents to allow the birdcage to hang freely in the book aperture. Lace is secured around the edge to make a decorative frame.

"Beads"

Small beads were attached to the bottom of the birdcage with pins and jump rings.

"Left hand panel"

The left hand panel features one of my favourite Graphics Fairy images - this old Victorian birdcage. Extra lace is added to the bottom of this panel to make a pocket for the tags (well, you need somewhere to write your message!).

"Tags"

The backgrounds are inked and stamped with C I stamps before dusting with Perfect Pearls and overstamping with a couple of Kaisercraft sentiments in archival. Matching lace is threaded through the tag holes.

"Back and sides"

Just to finish off the back and sides of the card, here's a good use for those peel-offs lying around forgotten in your stash.

Ingredients:
cardstock: white 300gsm, white 160gsm, hammered gold 200gsm
lace & bakers twine
Crafty Individuals stamp sets: CI-234, CI-287
Sizzix & Hero Arts stamp & die-cut set 657774
Kaisercraft stamp set: Life Sentiments
Sizzix Bigz dies: Tiny Tabs & Tags, Caged Bird
Spellbinders dies: Birdcage
Distress Inks
Archival Ink: Crimson
Perfect Pearls: gold heirloom
adhesives: Glossy Accents, Pinflair, PVA
peel-offs in geometric patterns for book cover
printoffs from the Graphics Fairy
beads, pins, jump-rings

Entered for the following challenges:
Crafty Individuals - Time for Summer
Craft Room Challenge - Ink It
Die-Cutting Divas - In The Garden
Bunny Zoe's Crafts - Ribbon or Twine
Craft Your Passion - Die Cuts and Punches
Simon Says Stamp and Show - Anything Goes

Monday, 5 March 2012

Glorious Green

This time of year, you really start to notice the green everywhere, and I'm sure that's truer here in Ireland than anywhere else in the world. Today's card is for a man in his 80s who has spent his life as a farmer. I've used my current favourite Crafty Individuals stamps (yes, again!), which gives me the excuse to tell you that one of my cards was picked as a winner on the Crafty Individuals blog this month - woohoo and thank you!

"Happy Birthday Bobby"

As you can see from the shadows in the photograph, we have sunshine again today :-). The background & main panel were created by applying distress inks to white card with cut 'n' dry foam. After drying, both panels were stamped and brushed with Perfect Pearls, before matting and layering.

"Bottom border"

Lots of texture & dimension was added with layers of dark green angel hair, inked lace, and diecut & stamped images (these are from the Hero Arts set).

"Birdcage Charm"

This charm is covered in melted UTEE. When cooled and set, the back is inked to match the project using alcohol inks, and the charm is glued using Pinflair.

"Sentiment"

The diecut dragonfly is inked with distress inks and dried. A versamark pen is run around the edge and Perfect Pearls brushed on to give some shimmer. The sentiment is stamped and heat-embossed in clear, and gems are added along the body for a bit of added sparkle.

Ingredients:
Crafty Individuals unmounted stamp set: CI-234
Hero Arts Stamp & diecut set 657774
Dovecraft Sentiment stamps
Spellbinders dies Fanciful Flight
Distress Inks: Tumbled Glass, Pine Needles
Perfect Pearls: Green Patina, Blue Patina
Versamark Ink: Charcoal
Stampendous Embossing Powder: clear
self-adhesive gems
Cardstock: white for stamping & diecutting, dark green for matting & layering
bird charm
UTEE, clear
Adirondack alcohol ink: Stream
Lace, various & dark green angel hair
Adhesives: PVA, Pinflair dimensional glue

Entered for the following challenge:
Joanna Sheen - Spring / Easter
Paper Sundaes - Green or Good Luck
Penny Black and More - Springtime
Crafty Calendar - Spring Clean
Secret Crafter - Green for Go
The Pink Elephant - Let's See Those Layers

Friday, 2 March 2012

Mother's Day Card Number 1

Good news today, I won the Joanna Sheen Challenge and have a fabulous £30 gift voucher to spend. Woohoo, thank you Joanna!! This month's challenge is to make Spring / Easter cards, so why not have a go? Well, I finally managed to get my Mother's day cards made, and this one has a lovely Spring scene so will be my entry.

"Happy Mother's Day"

I love to see the birds singing this time of year, and this free image from the Graphics Fairy is just so colourful and makes a great focal point. The image is printed, cut out and carefully shaped before applying Pinflair dimensional glue to the back and sticking to the background. The background stamping is from a Crafty Individuals set, and another Graphics Fairy image was used for the label with a Dovecraft sentiment stamped in black archival ink. The colours on the background, lace and flowers are all using the same distress ink pads with some Perfect Pearls on the stamped bird cage for a little shimmer.

"Closeup of lace & flowers"

I love this lace trim that Lee (aka CraftyLoops) got me from the US (thanks Lee :-))

Ingredients:
Crafty Individuals CI-234 unmounted stamp set
Dovecraft sentiment stamp
Distress Inks: Tumbled Glass, Barn Door, Pine Needles
Archival Ink: Black
Perfect Pearls: Blue patina
Lace
Flower trim
Chain
Beads
Adhesives: Glossy Accents, Pinflair

Entered for the following challenges:
Joanna Sheen - Spring / Easter
DYSU - Things with wings

Thursday, 16 February 2012

This one is for my husband

Now that valentine's is over for another year, I thought I'd share the card I made for my husband.

"You've caught my heart"

The background and front panel have the usual Tim Holtz' distress inks, stamps and Perfect Pearls.

"Charms and lace"

My good friend Lee (craftyloops) has been encouraging me to experiment with jewellery, and here I've been playing with some beads attached to jump rings via head pins, together with a couple of charms and a tiny die-cut heart inked to match the background. The gorgeous lace is some more of the stash from Kathy. Thank you both!

"Birdcage"

The birdcage and Elegant post diecuts were cut from dark card and dabbed with alcohol ink to give an aged metallic effect. Another diecut heart was inked & stamped before layering over a pair of stamped wings.

"Elegant post"

The birdcage was hung from the post with a chain of jumprings.

Ingredients:
Distress inks: Brushed Corduroy, Tattered Rose, Victorian Velvet
Adirondack alcohol ink: gold mixative
Tim Holtz clear scrylic stamp sets: Regal Flourish, Urban Grunge, Nature's Elements
Perfect Pearls: gold
Cardstock: white, black
Sizzix Bigz Tim Holtz birdcage die
Spellbinders Elegant Posts die
Spellbinders Nestabilities: Hearts
beads, jump rings, gold-coloured head pins
lace: various

Entered for the following challenge:
Joanna Sheen Challenge - Love is in the Air
Gingersnap Creations - Faux Technique (faux metal)

Monday, 6 February 2012

Free bird

Just about everything on this card has Tim Holtz' name on it in one way or another, from the inks, to the stamps, embossing folder, diecuts, and even the distress stickles.

"Free bird"

I love playing with these birdcages (a big thankyou to Lee (Craftyloops) for sending me the birdcage & bird diecuts), but I don't like trapping the bird in the cage, so inevitably end up with the bird peeping in (he's usually looking for his mate, or a bit of food!).  It's a bit of a sad day for us because one of our hens died last night, but I like to think that she's free now. Mind you, our hens have the life of Riley with Tom to look after them! He's still updating his blog with news of our flock and we have some more little ones due to hatch next Monday, but I digress...I've made this quite a detailed account of how to make the card for any beginners who happen to be reading this. If you're an expert, you can just skip the text and look at the pretty pictures :-)

"Distressed & stamped blue background with Perfect Pearls"

There is so much going on with this card it's hard to know where to start, but I'll start at the back and work my way forward. The blank card is decorated with blue distress inks and overstamped with various meadow stamps in brushed corduroy before brushing with Perfect Pearls. It's important to let the background dry completely before using Perfect Pearls on stamping, otherwise it will just adhere to everything.

"Embossed & inked tag with distress stickles"

To colour the tag diecut (another present from Lee - thankyou!), swipe Brushed Corduroy distress inks over the top side of the wood embossing folder before passing through a roller-type machine - this puts plenty of colour neatly into the grooves in the embossing. Next, use foam to work a few other colours into the tag (I used antique linen, crushed olive & walnut stain). Distress the outer edges (I even tore the edges a little), then stain with walnut stain. Finally, the entire tag was covered with a layer of rock candy distrss stickles by wiping it on with a finger.

The birdcage was swiped with clear versamark ink, sprinkled with silver embossing powder, then heat-embossed. This was repeated until a good, even texture was achieved. The birdcage was then shaped out in the middle for some dimension, and fixed to the tag with Pinflair dimensional glue (I find this glue is forgiving and allows some flexibility).

"Hello little birdy!"

The diecut bird was inked with blue, overstamped in brown, dried, then covered in distress stickles. The branch was coloured with brown distress inks. The wing was coloured in the same way and attached to the bird with Pinflair dimensional glue.

"Butterfly"

This little butterfly was stamped with clear versamark ink and heat-embossed in gold, then cut out and coloured with distress ink to match the background. I tend to make a whole sheet of these in one go with a few different stamps, then cut them out in the evening when watching TV. Kept in a little pot on the craft desk, they can then be coloured to match your project.

"Journalling ticket"

If you want your stamping to be neat and clear, then archival or memento inks are brilliant, but you sometimes want a smudgy, grungy stamp, and distress inks are ideal for this. They seem to "splodge" a bit better (and of course, they are ideal for Perfect Pearls powders). When stamping with distress ink, it is important to do any background inking first (you don't want to blend your stamp into the background!).

To make this ticket, first cut a rough rectangle of white card and ink it with blue distress inks. Next, stamp the journalling ticket with a brown distress ink. Allow to dry, then cut out. Distress the edges of the ticket, then take a piece of cut n dry foam and use it to work some brushed corduroy distress ink around the edges. If you want your ticket to look even more distressed, add some walnut stain ink. Stamp the sentiment nice and clearly with black archival ink. Finally, add a hole with a punch and tie to the top of the tag with some ribbon, setting the ticket at an angle.

"Organza flower with button centre"

To make an organza flower, diecut organza using the Tim Holtz Tattered Floral die. Taking each diecut in turn, hold the flower on a heatproof mat (use a tool with a wooden handle like an embossing tool or similar and NOT your fingers or you will burn them), and gently heat the edges with a heat tool on its lowest setting. If you heat too much, the fabric will just melt. You just want to curl the edges. Once you have a set of diecuts (one of each is sufficient), you can just fix them together with a brad, or sew them together as I have done here, and fix a button to the centre. These were just cheap, black, plastic buttons that I coloured by dabbing with Adirondack alcohol inks in blue and silver.

Goodness, if you read all that I hope you're not cross-eyed!!

Entered for the following challenge:
Simon Says Stamp and Show...Torn Edges, Distress Inks, a Button and some Wings!

Friday, 3 February 2012

Charming Birds on a Rainy Day

The wonderful birdhouse die used in today's card was a bargain (no, really!) in the Sizzix sale.

"Charming Birds"

The background stamping uses Crafty Individuals and Hero Arts stamps with plenty of distress inks and some Perfect Pearls. After stamping and colouring, it was spattered with droplets of water to give a softer effect. In the background, you'll also see a Tim Holtz tree diecut and coloured with distress inks to match.

"Birdhouse"

The birdhouse was cut from white and dark brown cardstock. The cards were individually coloured then layered. That gold mottled effect on the brown edging is from dabbing with gold adirondack mixative. The pale birdhouse was overstamped and some more Perfect Pearls used to give the effect of shimmery leaves. It was fixed to a dark brown backing with some foam tape to create some depth, especially for the central hole.

"Charming!"

A few holes punched into the bottom of the birdhouse provide anchoring points for some appropriately themed metal charms. These were attached to jump rings and threaded onto short lengths of gold thread.

"Butterfly and bird"

The butterfly and bird (from 7Gypsies "Conservatory" stamp set) were heat-embossed in gold onto white card, coloured with distress ink, and cut out before shaping and fixing in place with Pinflair dimensional glue.

"Sentiment"

The sentiment is from a Tim Holtz stamp set stamped in black archival ink and heat-embossed in clear, before matting and layering onto Spellbinders Labels diecuts (inked to match the rest of the card).

Entered for the following challenge:
Crafty Individuals - Spring
Gingersnap Creations - Glorious Greens
DYSU Challenge - Anything Goes (Wow, I'd LOVE to win those Crafty Individuals stamps!!)
Sparkles Forum - New Crafty Goodies (Birdhouse die)

Saturday, 3 September 2011

Birdhouse

Today I am sharing my method for making this pretty, decorative birdhouse from card.

"Decorated birdhouse"

A birdhouse template is printed in draft onto the reverse of an A4 piece of cream card decorated with sepia music notes and cut out. I adapted this free template from http://www.allfreecrafts.com/easter/house.shtml . The roof is cut out separately.

Once cut out, the card is decorated with the relief distress technique using a stamp - a Papermania Birdsong swirl was used here. Clear versamark ink is stamped and embossed with clear enamel. This provides the relief decoration when sponged with Tattered Rose distress ink. A few further swirls are overstamped using the same distress ink.

All the score lines are scored using a ruler and embossing tool (a scoring board could also be used), and a small hole punched near the point of one of the five-sided panels. I find it easier to tuck in the tabs to get the punch further down the panel, otherwise the hole is a bit too close to the top of the birdhouse.

"Decorated birdhouse template"


If you are going to hang the birdhouse so that you can see the underside of the eaves, you might want to decorate the underside of the roof. If your card isn't too thick, you can stick two pieces together so both sides are decorated. Once finished, a small eyelet punch is used to punch a hole in the centre of the roof. A piece of ribbon is looped and the loop pushed through the hole from beneath, then tied on the underside to make a knot. This makes a hanger.

The next job is to glue the tabs to join the base and sides, and to glue the roof on. A good, wet glue like PVA is best as it gives a strong bond. Once glued, the birdhouse is left to dry, preferably overnight, before embellishing.

"Plain birdhouse"

"Plain birdhouse showing the roof underside"

Finally, embellishments are added. Some gold braid for a skirt, a little blue tit & some fluffy feather in the hole, and a die-cut swallow on the ribbon. The finished birdhouses can be hung with pegs (don't hang near heat sources - card is flammable!).