Showing posts with label Tim Holtz. Show all posts

Tuesday, 6 March 2012

Feelin' Hot, Hot, Hot!

I know it's only March but, well a girl can dream :-)  I've had this tiny bottle for ages and when I saw the theme for Simon Says Stamp and Show this week, I just couldn't resist.

"Feelin' Hot, Hot, Hot!"

I do like tissue tape, but it is so expensive! It's easy to make your own - just stamp a sheet of tissue paper, cut into strips and adhere with a very thin coat of PVA.

"Side view"

The beach scenes really make me wish for a hot, Summers day. The rain is back here. Ah well, it is what makes things so green here in Northern Ireland!

Entered for the following challenges:
Simon Says Stamp and Show... Bottle it up!
Simon Says... Anything Goes

Monday, 20 February 2012

Sew fed up with the sewing puns :-)

Don't know about you but I'm a bit bored with all those sentiments like "Sew Pretty", "Sew Chic", "Sew, it's your birthday", etc. etc. Not bored with the sewing theme though, especially when I have this fabulous dress form and some gorgeous Crafty Individuals stamps to play with! This card is for my Mum's birthday - Happy Birthday Mum!

"Sew"

A variety of distress ink colours were used to create the background, then dried with a heat tool before overstamping in Brushed Corduroy and brushing with gold Perfect Pearls to get that shimmery background.

"Dress"

Different types of lace and flower trim were dyed with Tattered Rose distress ink and adhered to the dress form with glossy accents.

"Charms"

Sewing machine, pair of scissors and spinning wheel charms were fixed to a length of chain with jump rings and attached to a key ring threaded through an eyelet set into the card.


"Sentiment"

The sentiment is gloriously pun-free!

Ingredients:
Crafty Individuals stamp set CI-328
Kaisercraft clear stamp set: Life Sentiments
Distress Inks: Tumbled Glass, Bundled Sage, Tattered Rose, Brushed Corduroy, Walnut Stain
Perfect Pearls: Gold
cardstock: white A4 300gsm folded to make a blank, cream 300gsm for diecutting
Sizzix Bigz Tim Holtz die: Sewing Room
Spellbinders Nestabilities: oval, scalloped oval
Lace
Thread
Glossy accents
Pinflair dimensional glue
Eyelet
charms, chain, jump rings, key ring

Entered for the following challenges:
The ribbon girl - pink, brown & cream
Sweet Stampin' Challenge - 3 in a row (lace, buttons, charms)
Totally Gorjuss - Lace
Sarah Hurley - die cuts
Just Tracys crafts - for a female and something flowing (I used 3 different types of lace to make the dress!)

Sunday, 12 February 2012

What to do with a Topper...

Visiting the Belfast Craft Show last October, I had a mad moment and bought some Hunkydory toppers and months later I am still trying to decide what to do with them. Taking one of the toppers, I started by looking for matching distress ink colours, and after a while came up with this design for a "coming of age" birthday card:

"Time"

Taking an A6 panel, the clock was stamped with white acrylic paint and dried with a heat tool. The panel was then decorated with distress inks using the wrinkle-free distress technique and splattered with water droplets before overstamping the clock using a "ghosting" technique with black acrylic ink (you take the stamp in hand, without an acrylic block, and just stamp part of the design). An A5 panel of white card was trimmed slightly then inked in matching colours. Both panels and the topper were matted onto black cardstock, then layered as shown.

"Clock"

A clock, hands and gears were die-cut from recycled cat food box, before dabbing with alcohol ink to colour. The gears and hands were layered and attached to the A6 panel with a screw-shaped brad.

"Washers"

When I asked Tom for a couple of washers he gave me a whole trayful, but I don't really think he expected me to use them all! They make great embellishments for this type of card. Finally, a couple of Hunkydory tickets were added and the Tim Holtz "time" sentiment stamped. I think this would make a great card for an 18th birthday.

Ingredients:
Hunkydory "Bygone Times" topper & tickets
Sizzix Bigz Tim Holtz dies: Gadget Gears, Weathered Clock
Distress Inks: Pumice Stone, Milled Lavender
Archival ink: Black
Acrylic paint: white
Adirondack alcohol ink: Gold mixative
A5 card blank
cardstock: black, white
screw brad
washers
Pinflair dimensional glue
Glossy accents

Entered for the following challenges:
CES Challenges - lots of layers, 3 or more
Hotshot Craft - one for the boys
Papertake Weekly - Anything Goes

Friday, 10 February 2012

It's a Love Thing

Another love-themed card today:

"It's a Love Thing"

The background started out as a blank sheet of white card and was inked all over with distress inks before drying carefully with a heat tool on a low setting. The inked card was overstamped using a script stamp with more distress ink, stamping two or three times between each inking to vary the amount of ink on the card, then brushing with gold Perfect Pearls. Other stamps were then stamped with black archival ink. The decorated card was mounted onto a red card blank.

"Cupid"

The cupid, heart and three arrows were each cut from patterned paper and red cardstock, the edges distressed with ink, and the diecuts layered to create a shadow-effect as shown before adhering to the background with Pinflair to aid dimension. Picket Fence distress stain was brushed around each of the diecuts to give a "mystique" effect, enhancing the diecuts against the background.

The white lace was dyed by placing on a non-stick craft sheet and using a piece of cut n dry foam to apply distress ink before attaching to the card with glossy accents.

"Charm"

The aperture in a heart-shaped cameo charm with wings was filled with Glossy Accents and allowed to dry before adding a drop of alcohol ink to colour the heart. A small jump ring was used to attach the charm to a short length of chain. A heart-shaped eyelet was fixed to the card and the chain passed through the eyelet,
then attached to another charm on the inside of the card (I used a pegasus charm). In this way, the chain can be adjusted to hang the charms wherever you like.

"I Love You stickers"

Letter stickers were added to spell a message along the bottom of the card.

Ingredients:
Tim Holtz "Urban Grunge" clear acrylic stamps
Sizzix Bigz Love Struck die
Letter stickers from Tim Holtz seasonal sticker set
Valentine paper from Tim Holtz Seasonal paper pad
Cardstock: white 160gsm A5,
Cardstock: red 300gsm A4 (folded in half for card blank) + A5 (for diecuts)
Distress Inks: Barn Door, Aged Mahogany
Distress Stain: Picket Fence
Glossy Accents
Pinflair dimensional glue
Adirondack Ink: Watermelon
Archival Ink: black
Lace
Heart charm
Small length of bronze-coloured chain
Eyelet: heart-shaped
Pegasus charm

Entered for the following challenge:
Joanna Sheen - Love is in the air
Charisma Cardz - Things with Wings
DrsDesignsBlog - Make your own Pattern Paper
Hannah & Friends #131 - Be My Valentine
Divas by Design - Love is in the air
Crafting for all seasons - Love is in the air
Penny's Paper Crafty Challenge Blog - Love is in the air
Simon Says - Love is in the air
Truly Scrumptious - Love and Hearts

Monday, 6 February 2012

Free bird

Just about everything on this card has Tim Holtz' name on it in one way or another, from the inks, to the stamps, embossing folder, diecuts, and even the distress stickles.

"Free bird"

I love playing with these birdcages (a big thankyou to Lee (Craftyloops) for sending me the birdcage & bird diecuts), but I don't like trapping the bird in the cage, so inevitably end up with the bird peeping in (he's usually looking for his mate, or a bit of food!).  It's a bit of a sad day for us because one of our hens died last night, but I like to think that she's free now. Mind you, our hens have the life of Riley with Tom to look after them! He's still updating his blog with news of our flock and we have some more little ones due to hatch next Monday, but I digress...I've made this quite a detailed account of how to make the card for any beginners who happen to be reading this. If you're an expert, you can just skip the text and look at the pretty pictures :-)

"Distressed & stamped blue background with Perfect Pearls"

There is so much going on with this card it's hard to know where to start, but I'll start at the back and work my way forward. The blank card is decorated with blue distress inks and overstamped with various meadow stamps in brushed corduroy before brushing with Perfect Pearls. It's important to let the background dry completely before using Perfect Pearls on stamping, otherwise it will just adhere to everything.

"Embossed & inked tag with distress stickles"

To colour the tag diecut (another present from Lee - thankyou!), swipe Brushed Corduroy distress inks over the top side of the wood embossing folder before passing through a roller-type machine - this puts plenty of colour neatly into the grooves in the embossing. Next, use foam to work a few other colours into the tag (I used antique linen, crushed olive & walnut stain). Distress the outer edges (I even tore the edges a little), then stain with walnut stain. Finally, the entire tag was covered with a layer of rock candy distrss stickles by wiping it on with a finger.

The birdcage was swiped with clear versamark ink, sprinkled with silver embossing powder, then heat-embossed. This was repeated until a good, even texture was achieved. The birdcage was then shaped out in the middle for some dimension, and fixed to the tag with Pinflair dimensional glue (I find this glue is forgiving and allows some flexibility).

"Hello little birdy!"

The diecut bird was inked with blue, overstamped in brown, dried, then covered in distress stickles. The branch was coloured with brown distress inks. The wing was coloured in the same way and attached to the bird with Pinflair dimensional glue.

"Butterfly"

This little butterfly was stamped with clear versamark ink and heat-embossed in gold, then cut out and coloured with distress ink to match the background. I tend to make a whole sheet of these in one go with a few different stamps, then cut them out in the evening when watching TV. Kept in a little pot on the craft desk, they can then be coloured to match your project.

"Journalling ticket"

If you want your stamping to be neat and clear, then archival or memento inks are brilliant, but you sometimes want a smudgy, grungy stamp, and distress inks are ideal for this. They seem to "splodge" a bit better (and of course, they are ideal for Perfect Pearls powders). When stamping with distress ink, it is important to do any background inking first (you don't want to blend your stamp into the background!).

To make this ticket, first cut a rough rectangle of white card and ink it with blue distress inks. Next, stamp the journalling ticket with a brown distress ink. Allow to dry, then cut out. Distress the edges of the ticket, then take a piece of cut n dry foam and use it to work some brushed corduroy distress ink around the edges. If you want your ticket to look even more distressed, add some walnut stain ink. Stamp the sentiment nice and clearly with black archival ink. Finally, add a hole with a punch and tie to the top of the tag with some ribbon, setting the ticket at an angle.

"Organza flower with button centre"

To make an organza flower, diecut organza using the Tim Holtz Tattered Floral die. Taking each diecut in turn, hold the flower on a heatproof mat (use a tool with a wooden handle like an embossing tool or similar and NOT your fingers or you will burn them), and gently heat the edges with a heat tool on its lowest setting. If you heat too much, the fabric will just melt. You just want to curl the edges. Once you have a set of diecuts (one of each is sufficient), you can just fix them together with a brad, or sew them together as I have done here, and fix a button to the centre. These were just cheap, black, plastic buttons that I coloured by dabbing with Adirondack alcohol inks in blue and silver.

Goodness, if you read all that I hope you're not cross-eyed!!

Entered for the following challenge:
Simon Says Stamp and Show...Torn Edges, Distress Inks, a Button and some Wings!

Wednesday, 1 February 2012

Love is in the Air

I typed that title, and the song started playing in my head. Guess I'll be stuck with it for hours now :-) "Love is in the air, Every time I look around, Love is in the Air,...". It's the first of February today, so it's time for a Valentine's card:


"Love is in the air"

If you're wondering why there are two hearts, Tom doesn't like the one with the sword in, hence I've made it removable so I can still give him the card! The background is all done with distress inks, Tim Holtz stamps, gold perfect pearls and then overstamped with black archival ink. The tag is from Tim Holtz' Seasonal paper stash, with the "love" stamp heat embossed in cosmic shimmer gold, and the tag matted onto some gold card before fixing to the background.

"angled view"

The diecuts are Spellbinders "Fallen Angel". The hearts are cut from gold card and patterned papers. The sword & wings from gold card only.

P.S. If you're wondering how little chicky is getting on, he's four days old now and getting chirpier by the day. Tom has added some more photos to his blog.

Entered for the following challenges:
Joanna Sheen - Love is in the air (how spooky is that - same title!)
Divas by Design - Anything Goes
The House that Stamps Built - heat embossing
Pennys Paper-Crafty Challenge - Love is in the air
Truly Scrumptious Challenge - Love and Hearts
Anything Goes Challenge - To the One I Love
Craft Room Challenge - Valentines

Tuesday, 20 December 2011

Another tag!

Well, just when I thought the tags were finished, up pops another tag challenge...how could I resist?

"Reindeer tag"

The background uses a double embossing technique. Clear versamark was spread over the top side of the embossing folder, used to emboss white card, then heat-embossed with red embossing powder. This was repeated to add a different part of the embossing board so that the words read in two directions. Finally, the tag was inked with Bundled Sage, Pine Needles and Walnut Stain, and the edges distressed with scissors.

"Greenery"

A couple of swirly bits were cut from core-dinations card using a Sizzix strip die, then sanded to reveal the green core. Leaves were punched from different colours of textured card and the edges distressed with Pine Needles ink. A length of tuile was torn and added together with some red pearls for holly berries. Finally, a metal charm snowman was heat-embossed in white, a black promarker used to make buttons & eyes, and a tiny length of stripy ribbon cut for a scarf and wrapped around the snowman's neck, before attaching to a jump ring and hanging from the tuile.


"Glittery reindeer"

The reindeer was diecut from empty cat food box, heat-embossed in vintage gold, the covered with glue from a glue pad and sprinkled with ultrafine gold glitter before adhering to the tag. A red pearl was used for Rudolph's nose (it has to be Rudolph!).

"Tree charm"

The tree charm was decorated with tiny blobs of red, green and gold glitter glue for baubles. The star was filled with Liquid Pearls then a blob of holographic glitter glue added for extra sparkle. Finally, a length of frayed, green ribbon was threaded through the top of the tag.

Just to finish, I thought you might like to see the other tags featured this month. I couldn't bear to give them away yet :-)

"12 Tags of Christmas"

Entered for the following challenges:
Simon Says Stamp and Show...a Tim Holtz themed tag
Joanna Sheen - it's beginning to look a lot like Christmas
My Craft Spot - Tag...You're It!

Monday, 12 December 2011

Christmas 2011 - Tag 12 - Tissue paper

Tired but happy, here I am with my last tag for the time being, based on Tim Holtz' 12th tag of Christmas published today. Of course, most of the ingredients are once again missing from my craft room, but not to worry, you can make your own! Now for the tissue, you want the type of tissue paper that you would use for candle decorating. Mine came wrapped around some Ikea bookshelves, but you can use other types as explained in Karen's blog "A Lil' Bit of Redrottiness" here (she has a great tutorial on decorating candles).

"Tag 12"

The tissue paper was taped to a piece of card with the dull surface uppermost (shiny surface facing the card), then used to print a Graphics Fairy music image. A script stamp was used to decorate a tag, then the tag was covered with a layer of PVA glue and the tissue paper added on top.

"Angel"

A skinny house shape was hand cut from empty cat food box, painted with acrylic (white mixed with a little blue), dried, sanded, stained and covered in glitter glue. Three copies of an angel from the Graphics Fairy were printed onto cream card, cut out and decoupaged on top of the skinny house shape, and a flower added to the angel's hand. Note: the angel's feet don't touch the ground :-)

"Tissue paper flower"

Some more tissue paper was stamped in archival ink with Tim Holtz' script  and Curiosity stamps, then turned into a paper flower following the instructions on Tim Holtz' blog (I just used a normal stapler, making sure the flower folds were wide enough).


"side view of tag showing dimension"

Silver mirror card was used instead of metal sheet on card. In place of the lace die, a piece of a swirly die-cut was cut to size to decorate the tag's edge. "HOPE" was die-cut from mirror card and black card and arranged using my usual shadowing effect for extra dimension (I was pleased to see Tim using the same technique today, guess I wasn't the only one who had this idea!).

I thought it would be fun to finish up with a list of a few things I have learnt from Tim Holtz whilst doing these tags:
1. All sorts of things can be dried with a heat tool, including acrylic paint.
2. Glitter glue spreads really nicely with your finger ( I no longer seem to mind getting my fingers dirty and frequently use them for painting now too :-)
3. Shrink-plastic can be shrunk in a melt pot full of molten embossing powder (wow, can't wait to try this!)
4. How to transfer images using sticky tape.
5. Shrink plastic & acetate can be decorated with alcohol inks.
6. How to make a paper flower from tissue paper (and it's real purdy too!).

Entered for the following challenge:
Dream Valley Challenge: Christmas

Sunday, 11 December 2011

Christmas 2011 - Tag 11 - Shrink plastic, embossing and alcohol inks

I'm a big fan of shrink plastic. Watching that plastic curl up and shrink as you heat it never fails to fill me with wonder, it's just like being a kid again! So you can imagine my delight at seeing tag 11 from Tim Holtz. Here's my version using similar techniques.

"Tag 11"

The background tag is made from glossy cardstock decorated with distress inks, water splatters, a little Perfect Pearls splatter and the odd stamp.

Hopefully, Father Christmas is bringing me a melt pot this year (yippee!), but in the meantime, the shrink plastic was shrunk with a heat-tool, then embossed multiple times with clear embossing powder on one side, and decorated by dabbing with Adirondack alcohol inks on the other. A bit more time-consuming than Tim Holtz' method, but just as effective.

"Shrink plastic baubles"

So there I was, inking my embossed baubles, and it reminded me of inking facets and acetate, and I started to wonder whether the archival ink resist technique would work... I stamped a star on the back of a bauble with archival ink, then blotted it with kitchen roll and sure enough, the alcohol ink came off. What a fab effect!

The reindeer and "Merry Christmas" stamps were from old Papermania sets, stamped onto glossy cardstock with Archival ink and decorated with distress inks.

Saturday, 10 December 2011

Christmas 2011 - Tag 10 - Facet pictures

Another Tim Holtz tag and another technique: fixing pictures to the back of clear facets. I'd never tried this before, although I've seen it described on acetate. Anyway, it was great fun once I mastered the technique. Ordinary sellotape was used, but there was a bit of experimenting with the pictures. Unfortunately, I couldn't get my inkjet-printed Graphics Fairy images to transfer. I don't know whether it was the ink, or if I need to leave them longer, or something else. Paper images were ok, but the ones that worked best for me were preprinted on thin cardstock.

"Tag 10"

The background tag was cut from card printed with a vintage music image from the Graphics Fairy, then distressed with Aintique Linen, Brushed Corduroy and Walnut Stain inks and decorated with gold Perefct Pearls. After leaving this to dry thoroughly, the tag was stamped with holly & deer stamps in Forest Moss and heat-embossed in clear. The holly was further decorated with the addition of green and red glitter glue to highlight the edges of the leaves and the berries.


I wondered whether the gold embossing would come out OK on the facets (actually, not facets, but "see-thru stones" from my local craft shop), but it worked a treat. I shall definitely use this again. After transferring the images, the tape was stuck to silver mirri card with a tiny amount of glossy accents, then the facets were added with another small amount of glossy accents and left to set before cutting to size. They were fixed to the card with a little pinflair dimensional glue, and gold threads added to "tie" them to a die-cut branch.


The branch and letters were all cut from my old favourite, empty cat food box. The letters were painted with black acrylic paint on my finger, then left to dry and dabbed with Adirondack gold mixative, before fixing to the ribbon tags and covering with glossy accents. The ribbon tags were threaded onto gold tinsel before fixing to the card.

Entered for the following challenge:
Stampin' for the weekend - Christmas

Friday, 9 December 2011

Christmas 2011 - Tag 9 - Double heat embossed gothic tag

Just a quick one today. Wasn't the candle on todays' tag from Tim Holtz fantastic? Mine was cut by hand from grungepaper; I just had to have a go at reproducing the effect of the wax with glossy accents.

"Tag 9"

Of course, today's technique was the double-embossed background. This one was made using a V&A background stamp with Pine Needles, Barn Door and Walnut Stain distress inks.

"Greenery"

The greenery is a combination of Martha Stewart punched leaves, a swirl from a Sizzix decorative strip die, and a piece of garden insect mesh tied into a knot and torn.

Thursday, 8 December 2011

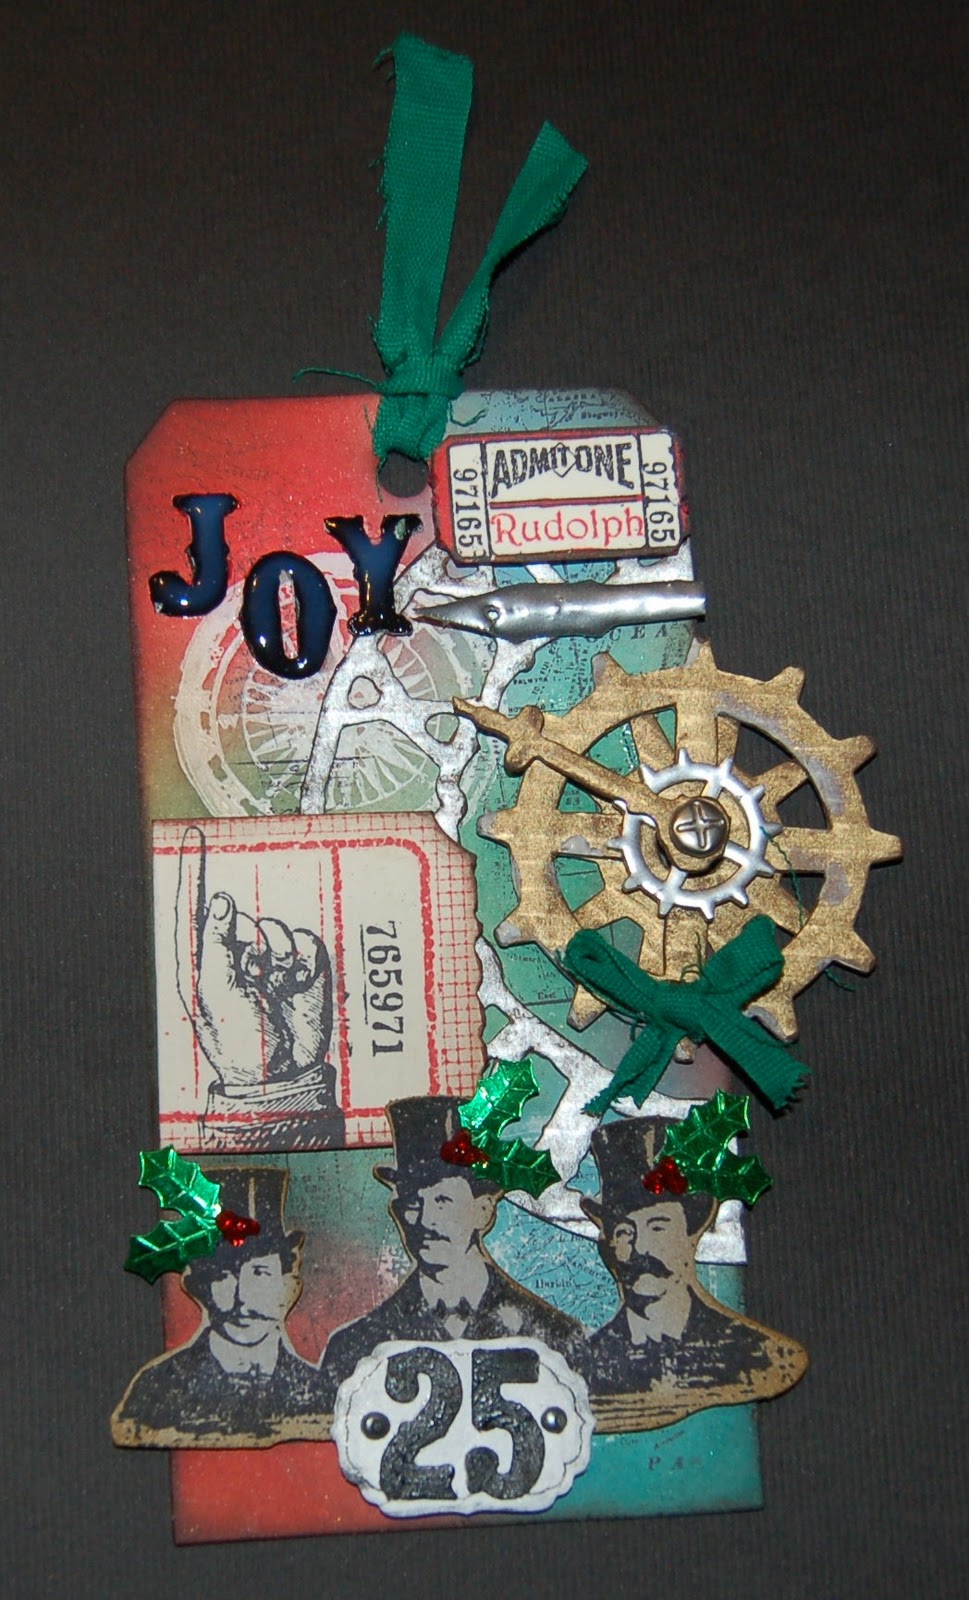
Christmas 2011 - Tag 8 - Steampunk yeehaaa!!

Wow, now that's what I call an original Tim Holtz tag! I've loved steampunk ever since reading H. G. Wells "Time Machine" as a child. I totally "get it"!! Tim's tag today is a brilliant example, and before I show you my cheap version, I want to share my love of my good friend Lee's steampunk stickpins - go on, have a look at her blog post here (but maybe finish reading this one first :-). OK, here we go, hold onto your hats...

"Tag 8"

This tag has been made entirely from dies, stamps and consumables - no adornments at all, honest! I don't have the big steampunk stamp set with the blueprints, etc., but luckily for me, I do have the little one with the top-hat men. Instead, a compass stamp was used with white acrylic paint to make the resist background, and this was inked with Barn Door, Pine Needles, Tumbled Glass & Weathered Wood inks, then overstamped with a map stamp in black archival using Tim's "ghosting" technique (no acrylic block).

"Gears"

The weathered clock & gadget gears were die-cut from empty cat food box and coloured with Adirondack mixatives in silver or gold before sanding and staining with Walnut Stain distress ink. A little white acrylic paint was added to the edges of the gears. More gears were cut from shrink plastic, shrunk and heat-embossed with silver embossing powder. A screw brad was used to join the gears with one of the clock hands, then all were fixed to the card with glossy accents.

"Journalling ticket"

Both tickets were stamped in Barn Door distress ink and Archival ink using masking techniques and a number of stamps (Kaisercraft - journalling ticket; Tim Holtz - hand, number, Admit One; mag freebie - Rudolph). The journalling ticket was distressed with scissors & ink, the "admit one" ticket was coloured with red promarker.

"Homemade Pen Nib"

This pen nib was made from grungepaper cut to size, then heat-embossed with silver embossing powder, a hole punched near the nib, and then the whole thing curled around a knitting needle to shape and further heat embossed to get rid of cracks.


"Joy"

The "JOY" and "25" were die-cut letters painted with black acrylic paint using a finger. "JOY" was fixed to the tag, then covered in glossy accents.

"25 plaque"

"25" was fixed to a small die-cut shape painted with white acrylic paint, dried with a heat gun, then decorated with a fineliner, dabbed with a little black acrylic paint to distress, and fixed to the card. Finally, a couple of "nailheads" were added with a little Pewter Liquid Pearls.

"Steampunk gentlemen"

"Tallyho" and "Toodlepip" from the steampunk top-hatted gentlemen - stamped on grungepaper, cut to size and edges inked, then decorated with holly sequins and red glitter-glue for berries.

Entered for the following challenge:
Charismacardz - no cards
Samuel Taylors Challenge - anything goes
Truly Madly Crafty - Christmas colours
Simon Says Stamp and Show - some elements of time

Wednesday, 7 December 2011

Christmas 2011 Tag 7 - Kraft Glassine, or not

Another day, another improvisation. OK, I admit it, I'm not rich. I don't have kraft glassine and racked my brains to come up with an alternative, and I think I have it. Maddy presents... stained greaseproof paper!!

"Tag 7"

I couldn't get Tim's video for tag 7 to load today (wonder if that was due to the number of viewers?), so not sure of the official colouring method, but the greaseproof paper was stained by dabbing with various colours of Adirondack inks & mixative diluted on the felt pad with a little blending solution. The paper was crumpled a few times into a ball, opened out and swiped with Walnut Stain distress ink. The holly leaves were then cut out.

"Holly ensemble"

My good friend Lee read about my predicament of not having any grungepaper and (thank you so much Lee) - sent me two sheets!!! Wow, I'd never even seen the stuff before. Now I don't know if it's just because I'm a veggie (did I mention that before? Well you know it now LOL!), but my finely tuned sense of smell definitely detects the scent of new leather in this stuff. Don't know whether it's cowhide or tanning chemicals...

 A branch was cut from Lee's grungepaper. There was no gold paint dabber available, but I did have some gold Adirondack mixative and dabbing on the grungepaper covered the branch beautifully. The branch edges were sanded and distressed with Walnut Stain, then decorated by rubbing with a little white acrylic paint from a tube and some holographic glitter glue. Small pearl beads were coloured with Cranberry Adirondack ink and threaded together with gold thread. A small length of gold tinsel and torn lace were also used.

"Merry Christmas"

In place of the Tim Holtz stamp (which is fabulous but not available to me unfortunately), a polkadoodle Merry Christmas was stamped onto Kraft cardstock in clear Versamark before heat embossing in black, cutting to size, distress staining and fixing to the tag.

You can also see the tag background quite well in this picture. The Indigo Blu crackle stamp from the Alice I set and a Tim Holtz script stamp were used on a background of Pumice Stone & Antique Linen-stained tag.

"Lace and pearls tag decoration"

Finally, a length of lace was coloured with Pine Needles distress stain and tied to the tag, and a couple of pearl beads attached with gold thread

P.S. Thanks also to Lee for the diecut tag & lace and to Linda for the tinsel.

Entered for the following challenge:
ABC Christmas Challenge - Yippee (anything goes)
Simon Says Stamp - Christmas Photomontage Inspiration
Creative Card Crew - 'Tis the Season
Create Me Pink - Christmas Colours
Papertake Weekly - Anything Goes

Tuesday, 6 December 2011

Christmas 2011 - Tag 6 - Metal embossing

Wow, today's tag from Tim was certainly different! Sticking metal foil to glossy card seems a bit extravagant to me when mirror card is readily available though, and besides, I don't actually have any adhesive metal foil, so I'm using silver mirror card.

"Tag 6"

Finally, I got the chance to use one of my new embossing folders from the Sizzix sale :) . An A6 piece of mirror card was embossed with a Texture Fades embossing folder, then coloured with promarkers (I didn't have any of the paints that Tim used). On this occasion, I avoided the letters leaving them silver. If you prefer, you can just colour the whole thing, then remove promarker ink from raised areas with a blending pen and a piece of kitchen roll. At this point, you can grunge it up a bit with some black acrylic paint, but I really like this bright metallic look for Christmas, so just left it "as is".

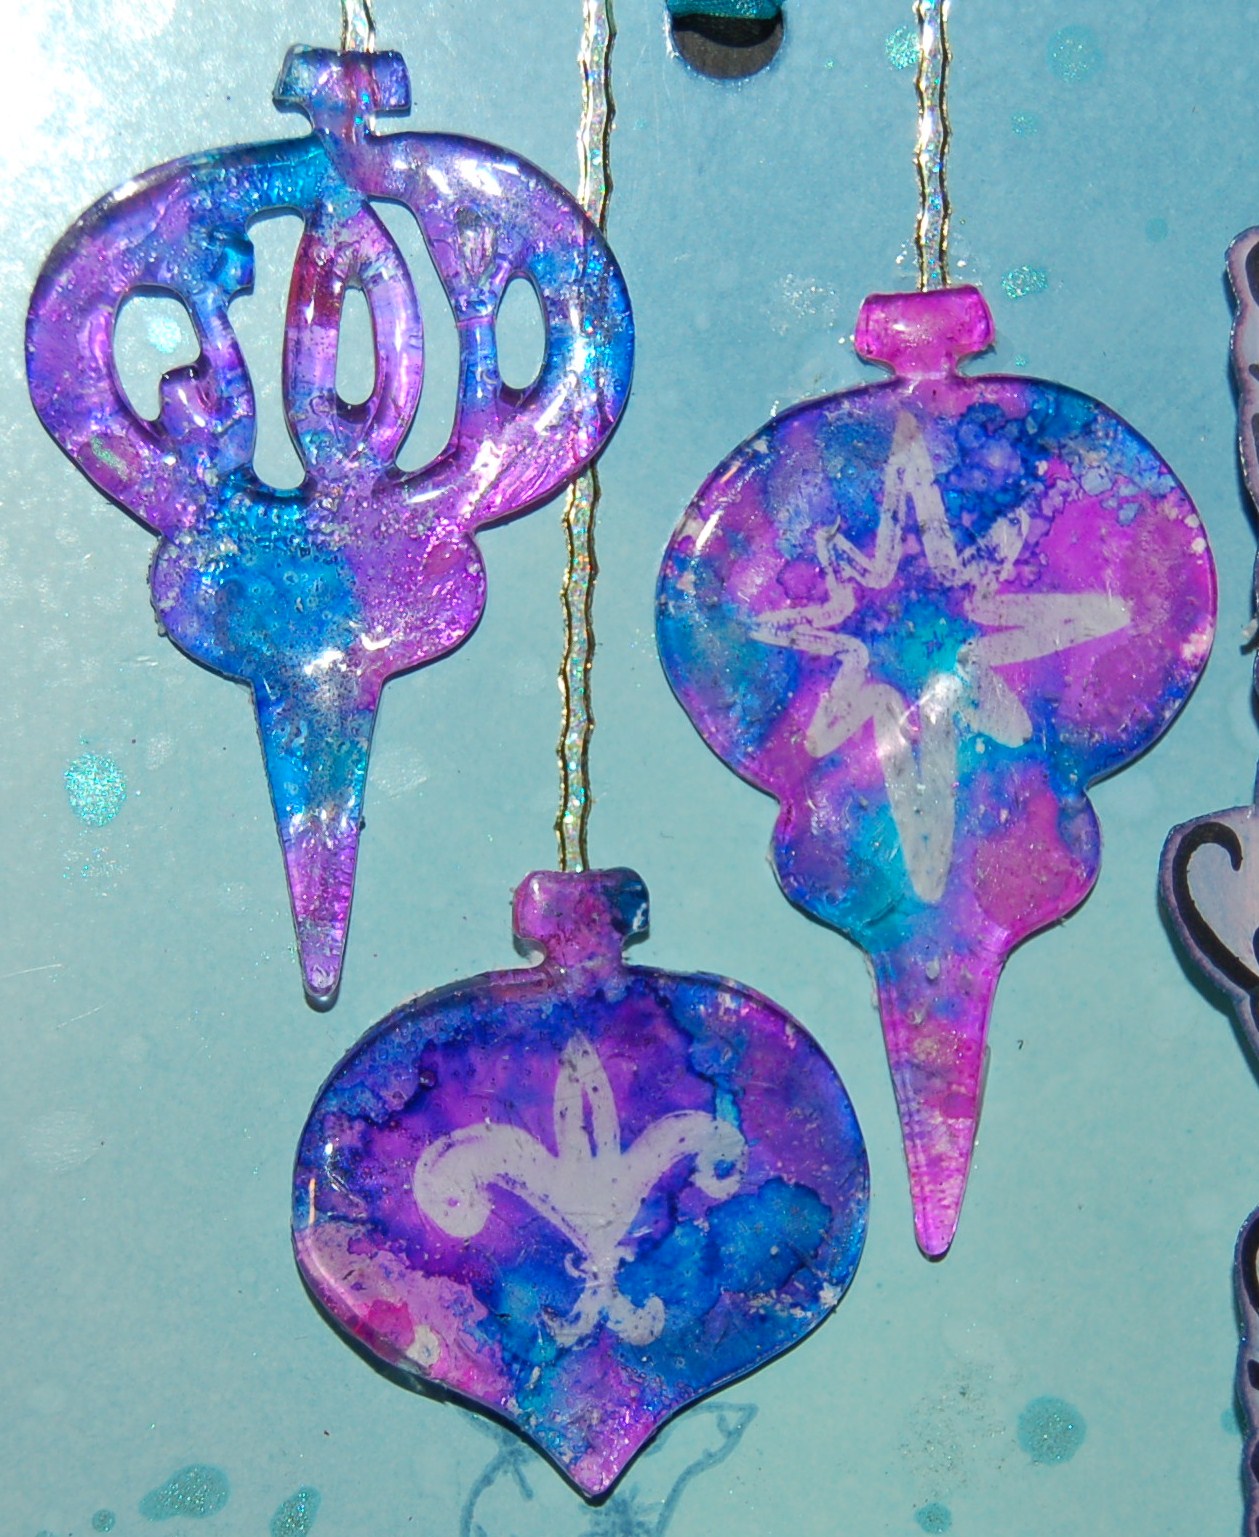
"Ornament"

Another recent purchase was this Mover & Shaker ornament die & the "Joy" insert. They were used to die-cut shrink plastic, which was then shrunk to size.

"Reindeer"

Both reindeer were also die-cut from shrink plastic and shrunk.

"Reindeer"

After shrinking, all the plastic pieces were triple heat-embossed with silver embossing powder (the cheap stuff works fine for this). These pieces can also be used as charms if you punch a hole in the plastic before shrinking. Here, the deer are stuck to the tag with Pinflair, and the bauble had a loop of silver thread tied around its neck before attaching to a length of silver ribbon passed through the top of the tag.

Entered for the following challenges:
Cards for Men - "2" (2 reindeer)
Crafty Cardmakers - Heat embossing
Lawnscaping challenge - Tags