Showing posts with label tag. Show all posts

Monday, 27 February 2012

Controlled Mayhem

Controlled mayhem. The phrase comes from one of the stamps in Graphic 45's Le Cirque range and it's a really good description of a circus! Today I'm sharing a card with matching gift tag. Just to prove I do actually use my promarkers, the coloured images on the card are stamped and hand-coloured :-)

"Controlled Mayhem card and gift tag"

It's hard work cutting out all those wheel spokes!

"Controlled Mayhem Card"

The background is inked with distress inks. The trapeze artist, ringmaster and audience are stamped with distress ink and brushed over with perfect pearls for plenty of shimmer. Other characters are stamped on card using memento ink, coloured with promarkers, cut out, shaped and finally mounted in place with pinflair. The sentiment is stamped straight onto the card using archival ink.

"Controlled Mayhem Card"

The angle on the above picture makes it easier to see the stamping without all the glimmer. I love the movement of the trapeze artist from the repeated stamping. She is swinging across the card.
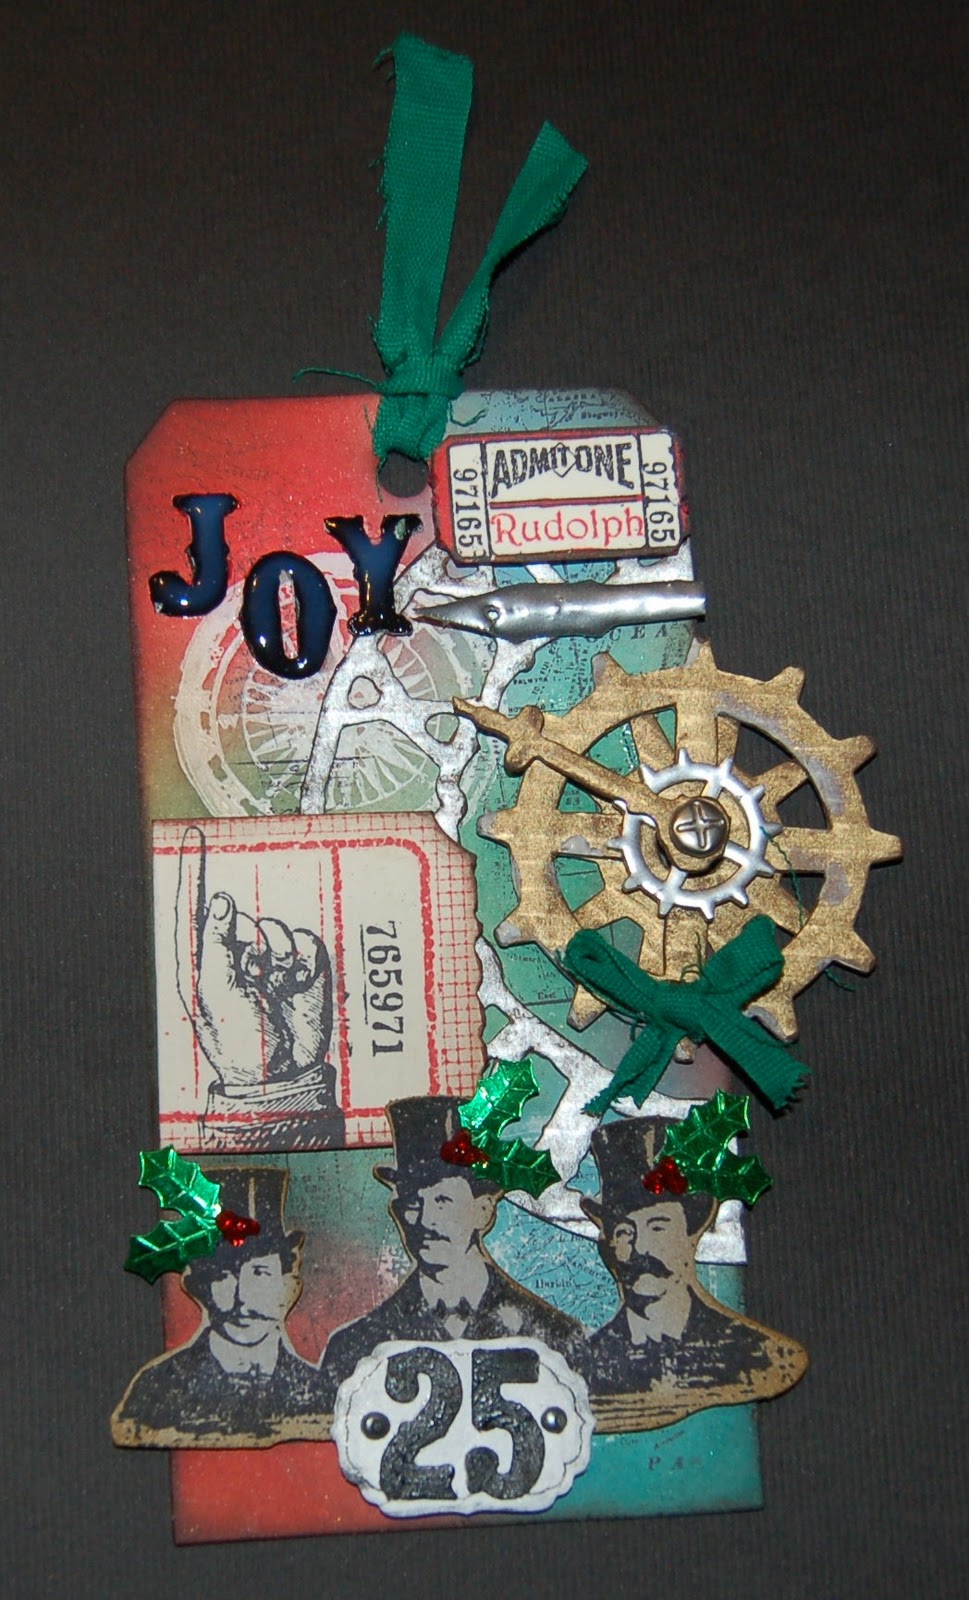
"Circus Mayhem Tag"

I wanted to get a real sense of circus mayhem on the gift tag without using the sentiment. To achieve this, lots of layers of stamped images are used. The lion, lion tamer and audience are stamped in distress inks, then heat- embossed in clear. The background is decorated with the same colours as the card (the clear embossing resists the inks), then the trapeze artist and clown are stamped and covered in perfect pearls. The ringmaster is stamped in black archival to bring him forward, and finally a few characters & words have are cut from scraps of Le Cirque papers and added with dimensional glue. Some water is added to "faux bleach" the audience faces.

"Circus Mayhem Tag"

This second view avoids the glimmer of the Perfect Pearls. I like the ambiguity of the lion tamer - is he taming the lion or the trapeze artist? 

Ingredients:
Graphic 45 Le Cirque 8" x 8" paper pad
Graphic 45 cling stamp set: Le Cirque 1
Graphic 45 cling stamp set: Le Cirque 3
Distress Inks: Mustard Seed, Spiced Marmalade, Barn Door, Fired Brick, Aged Mahogany, Scattered Straw, Vintage Photo
Memento ink: Rich Cocoa
Archival Ink: Black
Perfect Pearls: Gold
Promarkers
Adhesives: PVA, Pinflair dimensional glue
Cardstock: white 300gsm (tag), white 160gsm (background), black 300gsm (card blank)

Entered for the following challenges:
That Craft Place - Anything Goes
Just inspirational - Anything Goes
Willow Sketchie - Anything Goes
Do You Stack Up - Distress
Truly Scrumptious - All Creatures Great and Small
Pollycraft - Teenage Dream (running away with the circus!!)
Bunny Zoes Crafts - Celebrations

Saturday, 25 February 2012

London, Paris, New York

This week Simon Says Stamp and Show... London, Paris, New York, take your pick. Well I was a Londoner for 13 years and have no desire to go back LOL, so I have a project for Paris and a quick tag for New York.

Paris

"Paris on canvas"

There are a couple of new techniques for me involved in creating this piece and it was great fun. Firstly, working on canvas. The canvas is prepared with gesso and given a coat of white acrylic paint then set aside overnight to dry. Secondly, the wax paper transfer method. The Graphics Fairy offers links to 12 Easy Transfer Techniques, so when I noticed this one and knowing that Lee (aka Craftyloops) had just given me some wax paper (thank you Lee!), I gave it a go.

The wax paper transfer technique is used to transfer a fabulous Graphics Fairy image of the Eiffel Tower onto the prepared canvas. The eiffel tower image is left to dry, then masked with post-it notes, and distress inks applied to create the French flag. I used a dabbing method so as not to disturb the image too much, which is printed in water-based ink. The colours for the flag are carried over onto the sides of the canvas.

I raided my stamp collection for the stamps in the top right corner, which were applied with matte multi medium (I love this stuff!). The sentiment is from a Tim Holtz stamp which was part-inked with black archival and applied by hand (the canvas surface isn't flat enough for an acrylic block - just hold the stamp in your fingers to position, then gently apply pressure all over the back of the stamp taking care not to move it around or the image will smudge).

Ingredients:
Tim Holtz clear stamp set: French Market
Canvas
Gesso
Acrylic paint, white
Inkjet image freshly printed on wax paper
Credit card (great for smoothing the back of the paper when transferring the image)
Distress inks: faded jeans, barn door
Archival ink: black
Ephemera: French stamps

New York

Did you know that New York was considered the Jazz capital of the world in the 1920s? Neither did I until I googled it after wondering why my Jazz stamp set had a New York postmark included!

"New York, the Jazz Capital of the World!"

This tag uses one of my favourite techniques - the resist method. The butterfly stamp is inked up with distress inks, then stamped and heat-embossed in clear. The tag is coloured with distress inks and overstamped in black archival. I just love that jazz band! It's the same stamp set I used on my candles for the Graphic 45 audition, so will make a great gift tag to go with them.

Ingredients:
Graphic 45 cling stamp set: Curtain Call 3
Distress inks: Tumbled Glass, Broken China, Fired Brick, Chipped Sapphire, Pine Needles
Perfect Pearls: blue patina
Archival ink: Black
Embossing powder: clear
Tag: cut from 300gsm white card (thanks again Lee)
ribbon: black organza

Entered for the following challenge:
Simon Says Stamp and Show take your pick ... London, Paris, or New York!

Sunday, 15 January 2012

Alice Chess Tag Book

The theme at Altered Alice this month is stripes. Lewis Carroll represented "Through the Looking Glass" as a chess game, and a chess board is made up from sets of perpendicular stripes, so what better subject than Alice Chess for my entry!

"Alice Chess Tag Book"

Lewis Carroll's original chess representation was used for the subject of the front cover, with a gold punched border to turn his chess board into a more realistic one. The background has Tim Holtz stamped images with plenty of gold Perfect Pearls for some shimmer.

"First Moves"

Each double spread represents Lewis Carroll's moves and depicts the characters in the correct squares on his chess board for each part of the story.

"1. Alice meets Red Queen"

I've added numbers to help people who aren't familiar with the chess notation.

"1. Red Queen to King's Rook's 4th"

The red notation is numbered from the opposite end of the chess board!

"Second moves"

Each double page has an Alice move and a non-Alice move.

"2. Alice through Queen's 3rd (by railway) to Queen's 4th (Tweedledum and Tweedledee)"

Ask me nicely and I'll tell you how I made the railway :-)

"2. White Queen to Queen's Bishop's 4th (after shawl)"

The crowns here are stamped and covered in Perfect Pearls. Notice the white queen ends up in the square next to Alice, Tweedledee & Tweedledum.

"Third moves"

The squares have all been coloured by masking and inking with Red Barn distress ink.

"3. Alice meets White Queen (with shawl)"

Most of the images are John Tenniel's original illustrations from the late 19th Century (hence out of copyright), and coloured with promarkers.

"3. White Queen to Queen's Bishop's 5th (becomes sheep)"

I took the liberty of adding my own "Shirley the Sheep" design in here :-). Note the red king sleeping in the square next to where Alice met Tweedlee and Tweedledum. She really is in danger of being taken!


"Fourth moves"

Well, this is as far as I have got so far.

"4. Alice to Queen's 5th (shop, river, shop)"

This is where the white queen turns into a sheep, they end up in a boat, and then go back to the shop. One of the things that has really impressed me looking at John Tenniel's illustrations is that the characters are always depicted on the correct sides for the chess squares! Some day I'll have the time and money to do a big chess board version of this for the wall.

"4. White Queen to King's Bishop's 8th (leaves egg on shelf)"

I hope you noticed all the extra stripes along the way (Alice's stockings, Tweedledee & Tweedledum's shirts, the background in the shop, the railway...). Hopefully, I'll get a chance to add the rest of the moves in a later challenge.

Entered for the following challenges:
Altered Alice - Stripes
Simon Says Stamp...Spots and/or Stripes
The Stamp Man - Use Red

Tuesday, 20 December 2011

Another tag!

Well, just when I thought the tags were finished, up pops another tag challenge...how could I resist?

"Reindeer tag"

The background uses a double embossing technique. Clear versamark was spread over the top side of the embossing folder, used to emboss white card, then heat-embossed with red embossing powder. This was repeated to add a different part of the embossing board so that the words read in two directions. Finally, the tag was inked with Bundled Sage, Pine Needles and Walnut Stain, and the edges distressed with scissors.

"Greenery"

A couple of swirly bits were cut from core-dinations card using a Sizzix strip die, then sanded to reveal the green core. Leaves were punched from different colours of textured card and the edges distressed with Pine Needles ink. A length of tuile was torn and added together with some red pearls for holly berries. Finally, a metal charm snowman was heat-embossed in white, a black promarker used to make buttons & eyes, and a tiny length of stripy ribbon cut for a scarf and wrapped around the snowman's neck, before attaching to a jump ring and hanging from the tuile.


"Glittery reindeer"

The reindeer was diecut from empty cat food box, heat-embossed in vintage gold, the covered with glue from a glue pad and sprinkled with ultrafine gold glitter before adhering to the tag. A red pearl was used for Rudolph's nose (it has to be Rudolph!).

"Tree charm"

The tree charm was decorated with tiny blobs of red, green and gold glitter glue for baubles. The star was filled with Liquid Pearls then a blob of holographic glitter glue added for extra sparkle. Finally, a length of frayed, green ribbon was threaded through the top of the tag.

Just to finish, I thought you might like to see the other tags featured this month. I couldn't bear to give them away yet :-)

"12 Tags of Christmas"

Entered for the following challenges:
Simon Says Stamp and Show...a Tim Holtz themed tag
Joanna Sheen - it's beginning to look a lot like Christmas
My Craft Spot - Tag...You're It!

Sunday, 18 December 2011

Alice in Christmasland

Altered Alice have a Christmas-themed challenge this month, and there are some fabulous projects on the blog. It's definitely worth a visit if you like altered art. My entry is a tag:

"Alice in Christmasland"

The stamps are mostly from Indigo Blu's fabulous Alice I set.

For the background, the rabbit is stamped with white acrylic paint onto a die-cut white card tag, then the tag is inked with various-coloured distress inks and overstamped with the "Alice in Wonderland" stamp using a ghosting technique in black archival ink. The edges of the tag are distressed with a pair of scissors and inked with Walnut Stain.

The link from the the teapot charm is removed using a pair of sidecutters and adhered to the tag with Pinflair, carefully positioned below one of the rabbit's paws and in Alice's line of sight.

"WISH" is diecut in black using a strip alphabet die, fixed to the tag with PVA, and covered in Glossy Accents for extra dimension. Of course, I was in a bit of a hurry taking the piccies, and the "W" isn't quite dry - hence the bluish tinge.

"Snowflake"

The snowflakes are diecut from empty cat food box using a Sizzix die and covered with two coats of Picket Fence distress stain, drying with a heat tool between coats, before overstamping with the "Curioser and Curioser" stamp in black archival ink. More snowflakes are cut from acetate, covered with holographic glitter glue using a finger and fixed, glue side down, to the tag with holographic glitter glue. Some are adhered to the card snowflakes, and others are glued directly to the tag. A couple of small hearts are punched from white card, coloured with "Barn Door" and "Aged Mahogany" distress inks, and fixed to the centres of the card & acetate snowflakes.

"Alice"

Alice is stamped on grungeboard using archival ink, then cut out leaving a small border and roughly coloured with green & red distress inks before edging in Walnut Stain. Red, green and gold glitter glues are used to highlight areas and make her look a bit more Christmassy. A couple of holly leaf sequins are added to her hair along with some red glitter glue "berries". [aside: I rather like the red, glitter shoes, reminiscent of Dorothy's. Funny how they are both trapped in strange worlds and wanting to find a way home].

"Admit tickets, ribbon & rabbit"

The "admit tickets" are from a Tim Holtz set, stamped in archival ink on cream card. Red promarker is used to colour the border, before the edges are distressed with scissors and inked in walnut stain. Names are stamped in "Barn Door" distress inks using stamps from various sets.

A rabbit charm was attached to a jump ring and a length of green ribbon threaded through and attached to the tag.

"Journal ticket"

The journal ticket is from the Kaisercraft "Up, Up and Away" stamp set, stamped in Barn Door distress ink on cream card and dated "December 25th" by hand, before distressing, folding in half and adhering to the card beneath Alice.

Entered for the following challenges:
Altered Alice - A Lewis Christmas Carroll to all
Simon Says Stamp and Show... Thru' the looking glass - projects with depth (come on, it has to be Alice with a title like that! :-))

Monday, 12 December 2011

Christmas 2011 - Tag 12 - Tissue paper

Tired but happy, here I am with my last tag for the time being, based on Tim Holtz' 12th tag of Christmas published today. Of course, most of the ingredients are once again missing from my craft room, but not to worry, you can make your own! Now for the tissue, you want the type of tissue paper that you would use for candle decorating. Mine came wrapped around some Ikea bookshelves, but you can use other types as explained in Karen's blog "A Lil' Bit of Redrottiness" here (she has a great tutorial on decorating candles).

"Tag 12"

The tissue paper was taped to a piece of card with the dull surface uppermost (shiny surface facing the card), then used to print a Graphics Fairy music image. A script stamp was used to decorate a tag, then the tag was covered with a layer of PVA glue and the tissue paper added on top.

"Angel"

A skinny house shape was hand cut from empty cat food box, painted with acrylic (white mixed with a little blue), dried, sanded, stained and covered in glitter glue. Three copies of an angel from the Graphics Fairy were printed onto cream card, cut out and decoupaged on top of the skinny house shape, and a flower added to the angel's hand. Note: the angel's feet don't touch the ground :-)

"Tissue paper flower"

Some more tissue paper was stamped in archival ink with Tim Holtz' script  and Curiosity stamps, then turned into a paper flower following the instructions on Tim Holtz' blog (I just used a normal stapler, making sure the flower folds were wide enough).


"side view of tag showing dimension"

Silver mirror card was used instead of metal sheet on card. In place of the lace die, a piece of a swirly die-cut was cut to size to decorate the tag's edge. "HOPE" was die-cut from mirror card and black card and arranged using my usual shadowing effect for extra dimension (I was pleased to see Tim using the same technique today, guess I wasn't the only one who had this idea!).

I thought it would be fun to finish up with a list of a few things I have learnt from Tim Holtz whilst doing these tags:
1. All sorts of things can be dried with a heat tool, including acrylic paint.
2. Glitter glue spreads really nicely with your finger ( I no longer seem to mind getting my fingers dirty and frequently use them for painting now too :-)
3. Shrink-plastic can be shrunk in a melt pot full of molten embossing powder (wow, can't wait to try this!)
4. How to transfer images using sticky tape.
5. Shrink plastic & acetate can be decorated with alcohol inks.
6. How to make a paper flower from tissue paper (and it's real purdy too!).

Entered for the following challenge:
Dream Valley Challenge: Christmas

Sunday, 11 December 2011

Christmas 2011 - Tag 11 - Shrink plastic, embossing and alcohol inks

I'm a big fan of shrink plastic. Watching that plastic curl up and shrink as you heat it never fails to fill me with wonder, it's just like being a kid again! So you can imagine my delight at seeing tag 11 from Tim Holtz. Here's my version using similar techniques.

"Tag 11"

The background tag is made from glossy cardstock decorated with distress inks, water splatters, a little Perfect Pearls splatter and the odd stamp.

Hopefully, Father Christmas is bringing me a melt pot this year (yippee!), but in the meantime, the shrink plastic was shrunk with a heat-tool, then embossed multiple times with clear embossing powder on one side, and decorated by dabbing with Adirondack alcohol inks on the other. A bit more time-consuming than Tim Holtz' method, but just as effective.

"Shrink plastic baubles"

So there I was, inking my embossed baubles, and it reminded me of inking facets and acetate, and I started to wonder whether the archival ink resist technique would work... I stamped a star on the back of a bauble with archival ink, then blotted it with kitchen roll and sure enough, the alcohol ink came off. What a fab effect!

The reindeer and "Merry Christmas" stamps were from old Papermania sets, stamped onto glossy cardstock with Archival ink and decorated with distress inks.

Saturday, 10 December 2011

Christmas 2011 - Tag 10 - Facet pictures

Another Tim Holtz tag and another technique: fixing pictures to the back of clear facets. I'd never tried this before, although I've seen it described on acetate. Anyway, it was great fun once I mastered the technique. Ordinary sellotape was used, but there was a bit of experimenting with the pictures. Unfortunately, I couldn't get my inkjet-printed Graphics Fairy images to transfer. I don't know whether it was the ink, or if I need to leave them longer, or something else. Paper images were ok, but the ones that worked best for me were preprinted on thin cardstock.

"Tag 10"

The background tag was cut from card printed with a vintage music image from the Graphics Fairy, then distressed with Aintique Linen, Brushed Corduroy and Walnut Stain inks and decorated with gold Perefct Pearls. After leaving this to dry thoroughly, the tag was stamped with holly & deer stamps in Forest Moss and heat-embossed in clear. The holly was further decorated with the addition of green and red glitter glue to highlight the edges of the leaves and the berries.


I wondered whether the gold embossing would come out OK on the facets (actually, not facets, but "see-thru stones" from my local craft shop), but it worked a treat. I shall definitely use this again. After transferring the images, the tape was stuck to silver mirri card with a tiny amount of glossy accents, then the facets were added with another small amount of glossy accents and left to set before cutting to size. They were fixed to the card with a little pinflair dimensional glue, and gold threads added to "tie" them to a die-cut branch.


The branch and letters were all cut from my old favourite, empty cat food box. The letters were painted with black acrylic paint on my finger, then left to dry and dabbed with Adirondack gold mixative, before fixing to the ribbon tags and covering with glossy accents. The ribbon tags were threaded onto gold tinsel before fixing to the card.

Entered for the following challenge:
Stampin' for the weekend - Christmas

Friday, 9 December 2011

Christmas 2011 - Tag 9 - Double heat embossed gothic tag

Just a quick one today. Wasn't the candle on todays' tag from Tim Holtz fantastic? Mine was cut by hand from grungepaper; I just had to have a go at reproducing the effect of the wax with glossy accents.

"Tag 9"

Of course, today's technique was the double-embossed background. This one was made using a V&A background stamp with Pine Needles, Barn Door and Walnut Stain distress inks.

"Greenery"

The greenery is a combination of Martha Stewart punched leaves, a swirl from a Sizzix decorative strip die, and a piece of garden insect mesh tied into a knot and torn.

Thursday, 8 December 2011

Christmas 2011 - Tag 8 - Steampunk yeehaaa!!

Wow, now that's what I call an original Tim Holtz tag! I've loved steampunk ever since reading H. G. Wells "Time Machine" as a child. I totally "get it"!! Tim's tag today is a brilliant example, and before I show you my cheap version, I want to share my love of my good friend Lee's steampunk stickpins - go on, have a look at her blog post here (but maybe finish reading this one first :-). OK, here we go, hold onto your hats...

"Tag 8"

This tag has been made entirely from dies, stamps and consumables - no adornments at all, honest! I don't have the big steampunk stamp set with the blueprints, etc., but luckily for me, I do have the little one with the top-hat men. Instead, a compass stamp was used with white acrylic paint to make the resist background, and this was inked with Barn Door, Pine Needles, Tumbled Glass & Weathered Wood inks, then overstamped with a map stamp in black archival using Tim's "ghosting" technique (no acrylic block).

"Gears"

The weathered clock & gadget gears were die-cut from empty cat food box and coloured with Adirondack mixatives in silver or gold before sanding and staining with Walnut Stain distress ink. A little white acrylic paint was added to the edges of the gears. More gears were cut from shrink plastic, shrunk and heat-embossed with silver embossing powder. A screw brad was used to join the gears with one of the clock hands, then all were fixed to the card with glossy accents.

"Journalling ticket"

Both tickets were stamped in Barn Door distress ink and Archival ink using masking techniques and a number of stamps (Kaisercraft - journalling ticket; Tim Holtz - hand, number, Admit One; mag freebie - Rudolph). The journalling ticket was distressed with scissors & ink, the "admit one" ticket was coloured with red promarker.

"Homemade Pen Nib"

This pen nib was made from grungepaper cut to size, then heat-embossed with silver embossing powder, a hole punched near the nib, and then the whole thing curled around a knitting needle to shape and further heat embossed to get rid of cracks.


"Joy"

The "JOY" and "25" were die-cut letters painted with black acrylic paint using a finger. "JOY" was fixed to the tag, then covered in glossy accents.

"25 plaque"

"25" was fixed to a small die-cut shape painted with white acrylic paint, dried with a heat gun, then decorated with a fineliner, dabbed with a little black acrylic paint to distress, and fixed to the card. Finally, a couple of "nailheads" were added with a little Pewter Liquid Pearls.

"Steampunk gentlemen"

"Tallyho" and "Toodlepip" from the steampunk top-hatted gentlemen - stamped on grungepaper, cut to size and edges inked, then decorated with holly sequins and red glitter-glue for berries.

Entered for the following challenge:
Charismacardz - no cards
Samuel Taylors Challenge - anything goes
Truly Madly Crafty - Christmas colours
Simon Says Stamp and Show - some elements of time

Wednesday, 7 December 2011

Christmas 2011 Tag 7 - Kraft Glassine, or not

Another day, another improvisation. OK, I admit it, I'm not rich. I don't have kraft glassine and racked my brains to come up with an alternative, and I think I have it. Maddy presents... stained greaseproof paper!!

"Tag 7"

I couldn't get Tim's video for tag 7 to load today (wonder if that was due to the number of viewers?), so not sure of the official colouring method, but the greaseproof paper was stained by dabbing with various colours of Adirondack inks & mixative diluted on the felt pad with a little blending solution. The paper was crumpled a few times into a ball, opened out and swiped with Walnut Stain distress ink. The holly leaves were then cut out.

"Holly ensemble"

My good friend Lee read about my predicament of not having any grungepaper and (thank you so much Lee) - sent me two sheets!!! Wow, I'd never even seen the stuff before. Now I don't know if it's just because I'm a veggie (did I mention that before? Well you know it now LOL!), but my finely tuned sense of smell definitely detects the scent of new leather in this stuff. Don't know whether it's cowhide or tanning chemicals...

 A branch was cut from Lee's grungepaper. There was no gold paint dabber available, but I did have some gold Adirondack mixative and dabbing on the grungepaper covered the branch beautifully. The branch edges were sanded and distressed with Walnut Stain, then decorated by rubbing with a little white acrylic paint from a tube and some holographic glitter glue. Small pearl beads were coloured with Cranberry Adirondack ink and threaded together with gold thread. A small length of gold tinsel and torn lace were also used.

"Merry Christmas"

In place of the Tim Holtz stamp (which is fabulous but not available to me unfortunately), a polkadoodle Merry Christmas was stamped onto Kraft cardstock in clear Versamark before heat embossing in black, cutting to size, distress staining and fixing to the tag.

You can also see the tag background quite well in this picture. The Indigo Blu crackle stamp from the Alice I set and a Tim Holtz script stamp were used on a background of Pumice Stone & Antique Linen-stained tag.

"Lace and pearls tag decoration"

Finally, a length of lace was coloured with Pine Needles distress stain and tied to the tag, and a couple of pearl beads attached with gold thread

P.S. Thanks also to Lee for the diecut tag & lace and to Linda for the tinsel.

Entered for the following challenge:
ABC Christmas Challenge - Yippee (anything goes)
Simon Says Stamp - Christmas Photomontage Inspiration
Creative Card Crew - 'Tis the Season
Create Me Pink - Christmas Colours
Papertake Weekly - Anything Goes