Tuesday 26 February 2013

His 'n' Hers

In the space of a few short weeks here in Northern Ireland, almost everyone I know has a birthday! My husband, his sister, her husband, my best friend and most of her family... the list is endless. I said to hubby that there must be something in the air in May and he said it was the only time of year that it's warm enough to take off your clothes lol! Anyway, since his sister and her husband's birthdays are only a couple of days apart, I thought it would be fun to make "his 'n' hers" cards for them...

"His 'n' Hers"

I guess you could use a similar idea if you had to make cards for twins.
NB click on the pictures to enlarge them if you want to see more detail

"His"

The cards are similar in style, but for the man's card I've used a much more masculine colour scheme of black and gold.

"Meadow"

I still wanted it bright though, so I cut the diecuts from holographic card to reflect the light well. It doesn't matter what the pattern is on the holographic card when you are using it like this, any sort of pattern will pick up the light and reflect it in different directions to achieve the effect. It's supposed to look completely random like a real late Summer meadow, with everything in full bloom.

"Daisy Chains"

You might recognise the sentiment from the "Daisy Chain" card I shared a couple of weeks ago. It's heat-embossed in gold onto black cardstock, diecut and matted and layered onto alternating black and gold diecuts, with some gold diecut flourishes for extra embellishments.

"Hers"

The woman's card has a much more subtle colour scheme, but I kept the bright gold diecuts to match the two cards and because I like the brightness in these dark, Winter days.

"Meadow"

The background is sponged & stamped with distress inks, and I've used lace for a more feminine border in place of the diecut in the man's card.

"Sentiment"

The sentiment is stamped and heat-embossed in gold onto white card, diecut and sponged with matching distress inks, then mounted with foam tape onto another inked and stamped background. More lace is added to trim, along with a few daisies peeking out from behind the sentiment panel.

"Covers"

Here they are closed and tied, ready to hand over. If you fancy having a go at a book card, I have a tutorial here. It's easier than you think :-)

Ingredients:
IndigoBlu stamp set: Enjoy Life
Spellbinders dies: Labels 20, Resplendent rectangles
Spellbinders die d-lites: Poppy Patch, Cattails, Flower Burst, Fantastic Flourish One
Distress Inks: Tumbled Glass, Bundled Sage, Antique Linen, Tattered Rose
Versamark ink pad
Stampendous embossing powder, pirate gold
cardstock: brown 300gsm, black 300gsm, white 160gsm, black 160gsm, gold holographic
ribbon, gold (for ties)
lace
Daisies
adhesives: PVA, Pinflair, foam tape

Entered for the following challenge:
Simon Says Stamp and Show - The Stamp You Love (but don't use). I just love that IndigoBlu "daisy chain" stamp from the "Enjoy Life" set and thought I'd have a go at using it on a birthday card. It reads "Take the time to walk barefoot in the grass making daisy chains & believe in the beauty of your dreams".
Timeless Tuesday - All That Glitters


Tuesday 19 February 2013

Metal Mosaic Tutorial and an Easter Bunny Card

This week, Simon Says Stamp and Show...Metal-ology. I thought it would be a good chance to share a technique for making a metal mosaic which I used to make an Easter bunny for this card:

"Easter Bunny Card"

I like to recycle bits of old packaging in my cards, so often use cat food & dishwasher tablet boxes when I want a bit of thick card. Strong dishwasher or washing tablet boxes are ideal for use with this technique.

"Cover Card with strong ds tape"

1. Start by cutting a piece of strong card to roughly just over 5 x 5 inches.
2. Cover with strips of strong double-sided tape. I just use the cheap, red tape that you can buy in bulk at the craft fairs. If you want to be posh, you could use sticky sheets instead.

"Die-cut Covered Card"

3. Run your card through a die-cutting machine with a steel rule die such as a Sizzix Bigz die and separate the pieces.

"Remove tape backing"

4. Carefully remove the backing from the tape, taking care not to lift the tape from the card. If you accidentally lift the tape in a small section (like I did here with the bunny's ears), you can add a bit more and cut around it with a pair of scissors before having another go.
5. Cut up small scraps of patterned card to make the mosaic tiles.

"Arrange Mosaic Tiles"

6. Arrange the pieces of mosaic, pressing them down into the sticky tape and leaving gaps in between each of the edges.

"Heat-emboss"

7. Place the prepared die-cut onto a piece of paper and sprinkle metallic embossing powder onto all the exposed areas of sticky tape.
8. Shake off excess embossing powder and return to the pot.
9. Working in a well-ventilated area, heat the embossing powder and enjoy the little miracle (I never get over this, just love watching the powder transform!).

"Second Coat"

10. Re-heat each small area in turn, quickly adding a second coat of embossing powder while the first coat is molten, then heating again to melt. In this way, you can make a thicker layer of embossing that looks more metallic. If any bits are missed, you can also use an embossing pen to stick extra powder exactly where you want it.

"Glossy Accents"

11. Repeat all the steps to cover the matching bow.
12. Add a blob of glossy accents to each of the paper tiles and allow to dry overnight.

"Finito"

13. And this is Mr. Rabbit after drying. The extra coats of metallic distress powder give the edges of the paper a round appearance and the glossy accents makes the paper look like pebbles set in gold.

"Hanging Frame"

I made a quick background for the bunny with some sponged distress inks and stamping with green Perfect Pearls brushed on, then cutting to fit a frame die-cut from hammered gold cardstock. A couple of lengths of chain were fixed to the top of the frame with jump rings and attached to the card with a decorative brad. The frame and bunny were mounted with foam tape for extra dimension. The bottom layer of patterned paper was inked around the edges and matted onto more hammered gold cardstock, and finally fixed to a blank whose edges were also distressed. A Salvage Sticker sentiment was stuck at the bottom.

Ingredients for metal mosaic:
empty dishwasher tablet box
strong double-sided tape (or sheet)
steel rule die (I used Sizzix Bigz Tim Holtz' Bunny & Butterfly)
scraps of patterned paper (I used Tim Holtz Lost and Found)
metallic embossing powder (I used some old dregs of Cosmic Shimmer, it doesn't have to be pristine because any mottles and bits just make the whole thing look more realistic)
glossy accents

Ingredients for card:
metal mosaic
cardstock; white 300gsm (for card base), white 160 gsm (for inking and stamping), hammered gold 200gsm
Tim Holtz Seasonal paper stash
Tim Holtz Seasonal Salvage Stickers
Stampers Anonymous Tim Holtz stamp set: Spring Sprung
Spellbinders Decorative Labels Eight
Distress Inks: Bundled Sage, Pine Needles, Spun Sugar, Victorian Velvet
Perfect Pearls, heirloom green
chain, jump rings and decorative brad
adhesives: foam tape, PVA

Entered for the following challenge:
Simon Says Stamp and Show - Metal-ology
Cutie Pie Challenge - Pretty Pastels
Stamp and Create - Spring is Coming
Forever Friends - Animals and/or Butterflies and/or Birds

Thursday 14 February 2013

I Love You

This is the second of hubby's two Valentine's cards. Unusually for me, there's no stamping on this one (eek!).

"I Love You"

The background is a collage of Valentine's scraps left over from making last year's card. The letters are cut from patterned paper and stuck on to the background individually using mat Multi-medium, with pieces of lace in behind to highlight the words.

The border is cut from a leftover piece of patterned paper from which I had previously used the inner images; it is raised on foam tape to make a frame around the collage.

The large heart is attached via a jump ring and short length of chain through an eyelet set into the card. The chain is adjusted to length, then a large jump ring attached at the back to act as a stopper.

The finished collage is matted onto red card and has a few heart-shaped red gems added. A labels 28 easel is added to the back to act as a stand for the card.

Ingredients:
Tim Holtz Paper pads: Seasonal, Lost and Found
Graphic45 8" x 8" paper pad: Bird Song
adhesives: Claudine Hellmuth mat multi-medium, foam tape
heart charm, jump rings, chain & eyelet
lace
heart-shaped red gems

Entered for the following challenge:
Simon Says Stamp and Show...Something Messy
Crafty Creations Challenges - Love and/or Hearts
Divas by Design - Love and Romance
Frilly and Funky - Lacy, Heartsy Valentine's Project

Wednesday 13 February 2013

Because I Love You...

I made hubby two Valentine's cards this year. This is the first.

"Because I love you..."

The background is stamped in black archival ink and embossed with holographic powder. It looks black but when you catch it the right way in the light...

"Holographic embossing"

...you get these pretty interference patterns.

"Sentiment"

The main sentiment panel is constructed in a similar way to the Paris card I showed you last week.

"Be Mine"

I love the way you can change the sentiments in these Justrite sets to suit the card...

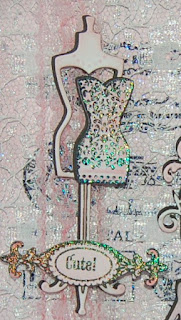
"Dress Form"

... and the matching dies are really handy. The lace is coloured with distress ink to match the background.

Ingredients:
Papermania V&A background stamp
Justrite Ooh La La French Frills stamp set
Spellbinders French Frills die set
distress ink pad: Barn Door
Distress Marker: Barn Door
Archival ink pad: Jet Black
Stampedous Embossing Powder: Kaleidoscope
lace
cardstock: white 220gsm, white 300gsm, black 220gsm, red 220gsm

Entered for the following challenge:
Loves Rubber Stamps - All About Love
Ribbon Carousel - Love is in the air
Top Tip Tuesday - Let Me Call You Sweetheart
Allsorts - Valentines

Tuesday 12 February 2013

Tim Holtz' 12 Tags of 2013... February

Simon Says Stamp and Show's challenge this week is "Something Messy". I've combined my entry with my version of Tim's February tag since I love to get messy with inks, but also wanted to try out my melt pot!

"Izzwizz' version of Tim's February Tag"

The background uses Barn Door & Antiqued Bronze distress stains with plenty of spritzing  for that watery effect, the edges distressed and lightly sponged with Black Soot distress ink.

"Decoupaged Cupid"


The cupid is stamped once onto the tag and three times in black archival onto watercolour paper before colouring with distress markers. I like to use the markers as paint with a detail water brush to give good blending, but the markers' fine tips are great for adding detail to hair and wings. After colouring, parts of the image are cut out and superimposed on the image stamped on the tag. As well as the decoupaged cupid, you can see the background inking quite well in the above closeup.

"Love Tickets"

The ticket is stamped three times onto white card using black archival ink before colouring with distress ink pads and markers and cutting out. I like to tear the two ends of the tickets rather than cutting with scissors to give a more realistic look. The tickets are fixed to the top of the tag with a vintage-looking brad from my stash.

"Heart Charm"

A salvage sticker was cut to fit a heart charm blank and stuck inside. The charm is then filled with UTEE. I allowed the UTEE to colour into a light caramel to let the charm look naturally aged, and didnt worry about bubbles. I think it has more of a look of old resin this way. UTEE will darken more the longer you heat it in a melt pot; if you want it really clear, use it quickly.

"Finished Tag"

Finishing touches include some heart ribbon along the bottom, died with Barn Door distress stain, and some Baker's Twine, coloured with Tattered Rose distress stain to tone the white down to match. The black heart in the background was from a Black Magic Co-ordinations pad and has its edges sanded. I embossed with the barbed wire embossing folder and sanded that too, but the embossing ended up pretty much hidden in the finished tag. Finally, the heart stamp was stamped on the edges of the left and right of the tag.

Now, while I had the melt pot out, I wanted to have a go at making some UTEE embellishments from my own moulds, and this is what I made...

"UTEE embellishments from my own moulds"

Not bad for a first attempt :-)

Ingredients:
Stampers Anonymous Tim Holtz Stamp Set - Love Struck
Sizzix Tim Holtz embossing folder - Barbed Wire
Sizzix Bigz - Tag (thanks Lee!)
Ranger Tim Holtz Distress Stains - Barn Door, Antiqued Bronze, Tattered Rose
Ranger Tim Holtz Distress Ink Pads - Antique Linen, Tattered Rose, Barn Door, Black Soot
Ranger Tim Holtz Distress Markers - Tattered Rose, Scattered Straw, Vintage Photo, Antique Linen, Barn Door
Ranger Archival ink pad - Jet Black
UTEE & Melt Pot
Tim Holtz Salvage Stickers - Seasonal
Heart Charm
Heart Ribbon
Baker's Twine
Vintage Brad
cardstock: manilla 300gsm (tag), watercolour (cupid), white 200gsm (tickets)
Adhesives: Glossy Accents, Pinflair

Entered for the following challenges:
Simon Says Stamp and Show... Something Messy
Totally Gorjuss - Love
Mark's Finest Papers - Love
Craft Room Challenge - Make Your own Embellishments

Sunday 10 February 2013

French, Feminine and Frilly

Ooh la la, I love a bit of lace don't you? I had this idea to do a card background and completely cover it with lace. I thought it would fit nicely with a vintage French theme. This is my Mum's birthday card, so if you are looking in Mum, don't peek :-)

"French, Feminine and Frilly"

The background is sponged with Spun Sugar distress ink, stamped in black archival ink and heat-embossed with holographic powder to give an all-over pearly look before covering completely with a sheet of lace, securing behind, and matting onto black card to hide the edges. The lace is white, but it reflects the colour of the background.

More lace is coloured with Spun Sugar distress ink and wrapped around the card. A big, floppy bow is also tied with lace.

"Dress Form"

The dress form and sentiments are stamped in black archival ink and heat-embossed with holographic powder before cutting out with the matching dies.

"Ooh La La!"

The dies have also been used as stencils for sponged ink and a black promarker fineliner pen used through the stencil to edge the details. A spun sugar distress marker is used to highlight aspects of the stamped designs.

"Bonjour mon ami"

The diecuts have each been cut out twice in white and black card. In each case, the white diecut is sponged with distress ink, then adhered slightly off to one side of the black diecut to give a shadow effect.

Ingredients:
Justrite stamps Ooh La La French Frills
Spellbinders dies: French Frills, Venetian Accents
Distress ink pad & marker: Spun Sugar
Archival Ink pad: Jet Black
Stampendous embossing powder: Kaleidoscope Transparent
cardstock: white 160gsm, black 300gsm
lace

Entered for the following challenge:
Justright Friday Challenge 90 - Sketch
Penny Black and More - Pink, Pearly and Swirly
Totally Gorjuss - Anything Goes with Lace

Wednesday 6 February 2013

Hey Diddle Diddle

This week, Simon Says Stamp and Show...Ever After. I've gone for a nursery rhyme theme after coming across a scene on the Graphics Fairy's site.

"Hey diddle diddle, The cat and the fiddle..."

 The background is built up with multiple layers of sponged distress inks and left to dry.

"View showing dimension in decoupage"

 I printed a few copies of the image, then cut out all the characters and layered them up individually so that I could arrange them on my own background.


"Perfect pearls shimmer"

Various stamps are used with distress inks and brushed with Perfect Pearls to achieve the shimmery otherworldy effect. Distress markers are used to add some shading beneath the dog, cat & dish to tie them in to the background, the scene is matted onto thick purple card, and a couple of strips of lace are added top and bottom. The lace was a fabby present from my friend Lee - thank you :-)

We have sunshine today - whoopee!!

Ingredients:
Graphics Fairy free image, 4 copies printed
Katy Sue Designs stamps: Silhouette Trees and Flowers
IndigoBlu stamps: Wild Meadow
Artemio stamps: insects
Justrite Spellbinders die: Vintage Label and Banners
distress inks: Tumbled Glass, Broken China, Stormy Sky, Faded Jeans, Chipped Sapphire, Milled Lavender, Shaded Lilac, Dusty Concord
distress marker: Milled Lavender
Perfect Pearls
adhesives: PVA, Pinflair, Glossy Accents
lace
cardstock: white super smooth 160gsm, purple 300gsm

Entered for the following challenge:
Simon Says Stamp and Show... Ever After

Tuesday 5 February 2013

Justrite Challenge 89...Anything Goes (Rivets Technique)


This fortnight those lovely peeps at Justrite have challenged us to use our favourite Justrite stamp. I have found it really hard to choose! Especially because they seem to prefer the fluffy, girly cards with lots of flowers and ribbons and lace (well, I guess a lot of people prefer those), but I've come to the conclusion that my favourite Justrite stamp is this masculine one of a car. It's hard to find good stamps for men's cards, but this one just inspires me every time I use it. Hope you like it too! If you'd rather I stuck to the girly cards then you'd better let me know :-)

"My favourite Justrite stamp"

There's a lot of inspiration from Sue Wilson in this card. I rather like her "paved pearl" technique, but wanted to see if I could make rivets instead, so used Pewter liquid pearls and tried to give the dots pointed tips.

"Rivets"

The messier the better for this technique! You don't want to touch the tip of the bottle to the card, but rather hold the tip above the card and let the liquid drip down, then draw the bottle up until the liquid drip breaks away. Don't forget to let your card sit undisturbed for 24 hours after finishing the rivets to let them dry properly or they'll end up squashed.

"Gears"

For the background, I've used a technique where I dry-emboss a pattern into mirri card (in this case, a selection of cogs and gears", then rub black acrylic paint into the recesses for an oily effect, buffing a little with kitchen roll before the paint is entirely dry. More gears are diecut from mirri card and some of them painted in a similar manner to the background, before being adhered with Pinflair or layered with screw-head brads.

"My favourite Justrite stamp"

The Justrite stamp is stamped in black archival and heat-embossed in clear before lightly sponging with Pumice Stone distress ink and mounting onto grey and black mats made by diecutting with the same die and cutting in half horizontally to make them appear larger than they are and act as frames for the main image (another technique learned from Sue Wilson).

Well I met up with my best mate Lee (aka Craftyloops) at the weekend and we had a whale of a time talking about crafting and crafting and crafting lol! If you haven't seen her blog, you should check it out. She has the most amazing flower tutorials. There's snow here in Northern Ireland today, so we are both cosy and warm in our own houses hoping that there may be a day or two of Summer ahead this year. Stay safe everyone. xxx

Ingredients
Justrite Going Places Vintage Labels
Justrite / Spellbinders Vintage Labels and Banners Dies
Spellbinders Sprightly Sprockets dies
Cuttlebug Gears Embossing Folder
black acrylic paint
distress ink: Pumice Stone
black archival ink
clear embossing powder
cardstock: grey 300gsm, black 300gsm, white 200gsm, silver mirri card
screw brads

Entered for the following challenge:
Justrite Friday Challenge 89 - Anything Goes

Friday 1 February 2013

Simon Says Stamp and Show...Seeing Stars (and two comets!)

This week Simon Says Stamp and Show's Challenge is "Seeing Stars". I racked my brains long and hard before it hit me. Did you know there are two bright comets expected this year? Comet C/2011 L4 should be visible in March, and Comet C/2012 S1 in November. The latter is expected to be one of the brightest comets seen for many years, and should be visible to the naked eye for a couple of months. With that inspiration in mind, I set to work...

"Seeing stars...and a comet"

Two panels of white card are sponged with layers of distress ink. The smaller panel is stamped and decorated with Perfect Pearls. The larger, darker panel splattered with water droplets and dried with a heat tool, obtaining a faux bleach effect to resemble a night sky.

"Closeup"

You can see the droplet effect in the background panel quite well in this closeup photograph.

"Townscape"

A couple of townscape diecuts are made from old cat food boxes. The individual houses are decorated with metallic distress stains, then fixed to the front of the card with glossy accents. Distress markers are used to colour inside the windows, then each of the windows is filled with glossy accents and left to dry.

"Comet"

The "comet" is a gold star button from my stash, with the loop removed from the back to let it stick down flat. It's "tail" is made up from individual beads (from a necklace that broke the first time I wore it - knew those beads would come in handy for something :-)).

The "eye in the sky" could be Patrick Moore looking down and admiring the comets from a different angle this year. R.I.P. Sir Patrick Alfred Caldwell-Moore CBE, FRS, FRAS (4 March 1923 – 9 December 2012)

Ingredients:
Tim Holtz Sizzix On The Edge "Townscape"
Tim Holtz Stampers Anonymous stamp set "City Central"
Tim Holtz Ranger Distress Inks "Tumbled Glass", "Stormy Sky", "Faded Jeans", "Chipped Sapphire", "Broken China", "Walnut Stain"
Tim Holtz Rangers Metallic Distress stains "Tarnished Brass", "Brushed Pewter", "Antiqued Bronze"
Tim Holtz Ranger Distress Markers "Chipped Sapphire", "Barn Door", "Mustard Seed"
Perfect Pearls "Blue Patina"
Ranger Archival Ink: Jet Black
cardstock: white 160gsm, black 300gsm
star, beads
adhesives: PVA, glossy accents, Pinflair dimensional glue

Entered for the following challenge:
Simon Says Stamp and Show...Seeing Stars